2018/11/28

How to setup VXDIAG GM Tech2Win on Windows 10 64 bit

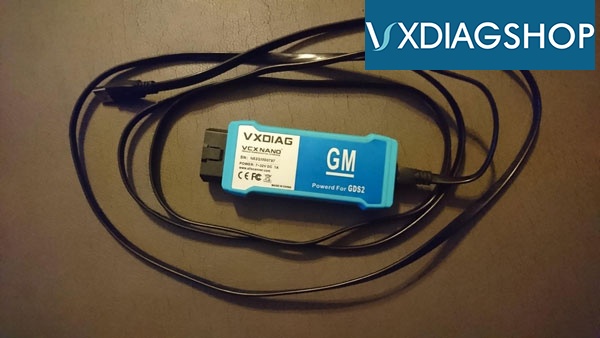
Here I’m only speaking for the Tech2win software to use with VXDIAG VCX NANO for GM. Website says that Tech2Win only runs from a Windows XP/7 32-bit computer. But I have laptops running Windows XP, 7, 8, and 10 32 & 64 bit. So i could try on any operating system.
 
That i did run straight from a Windows 10 64-bit laptop.


Tech2Win Windows 10 64 bit: need luck!
 
On a Windows 10 64-bit laptop – I’ve seen lots of bad experience on forums.
 
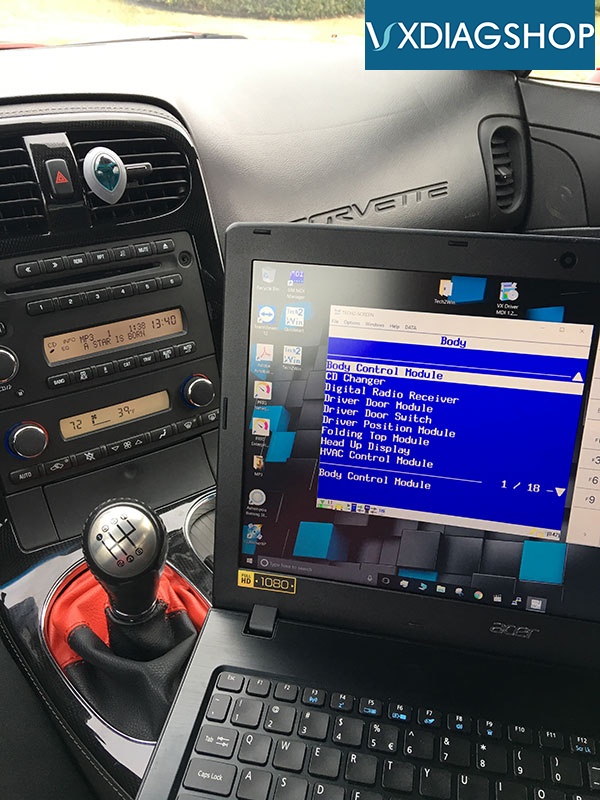
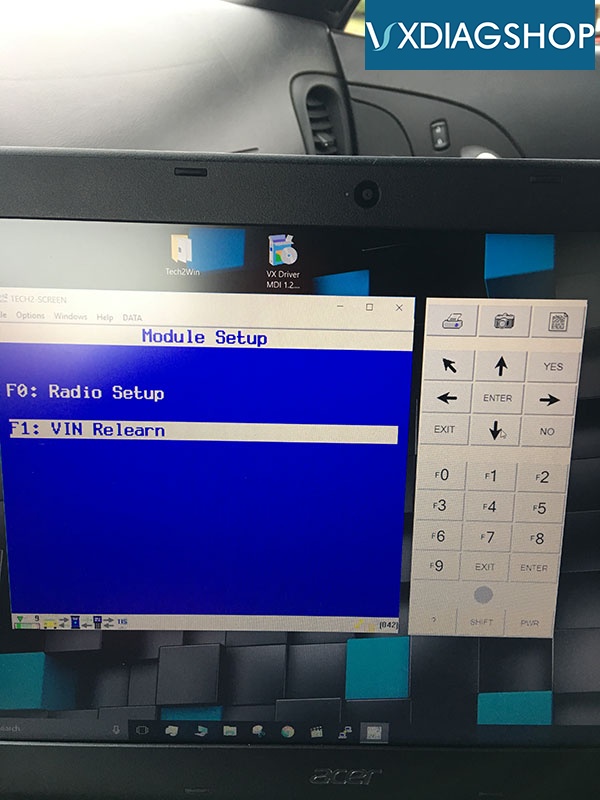
But the tech2win software runs just fine on my Windows 10 64bit laptop. Would be even cooler with a surface pro or similar tablet.
Went into my device manager, expanded the Human Interface Devices and disabled the touchscreen device. I then could run Tech2Win and the MDI selector popped up like it should. If your device only has a touchscreen you will have to add a keyboard (either wired or Bluetooth) before you disable the touchscreen so you can use Tech2Win.
 
I’m willing to bet some device that some GM dealerships run the software on are touchscreen (with a compatible Lib) and in windows 10 we have some sort of touchscreen Lib (not compatible) conflict with the application.
 
gm-tech2win-windows-10-image-1
gm-tech2win-windows-10-image-2
Tech2Win Windows 10 with Windows 7 mode: worked!
 
On tech2win, although the op is stating that its working in 64 bit mode, really want to go through it to double check if it needs to run in win 7 compatible mode for everything to work “correctly” instead.
 
Putting tech2 win into win 7 compatibility mode is not hard to do.
 
Go to the start icon for tech2win, right click it and go to properties, and see if you can click the box and make it run it in win 7 mod.
 
If the box is grayed out and you can not do it this way, click on the Windows icon, type in run in the search box, then find run program made for a previous version of windows in list it will bring out and click on that to open that program. From here, it pretty straight forward to find Tech2 win, and change tech2 win so it running in win 7 compatible mode.
 
 
Another good tip: Tech2Win Windows 7 32/64 bit – also worked
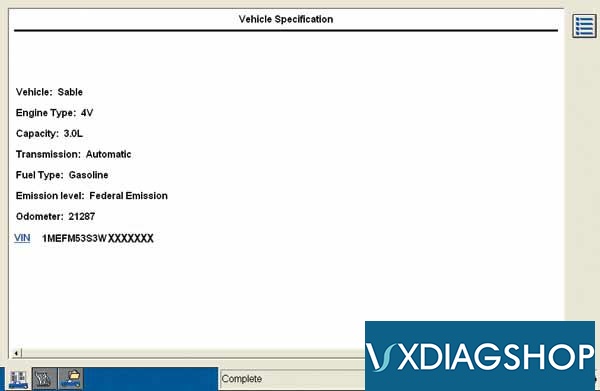
On a 32bit machine running win 7, tech2 seems to be working since I just did a quick check on the car with it, But still trying to skin the cat to get the VXDIAG VCX Nano to work on my 64bit machine.
 
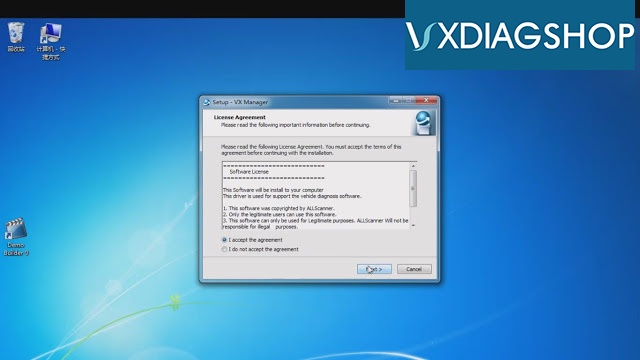
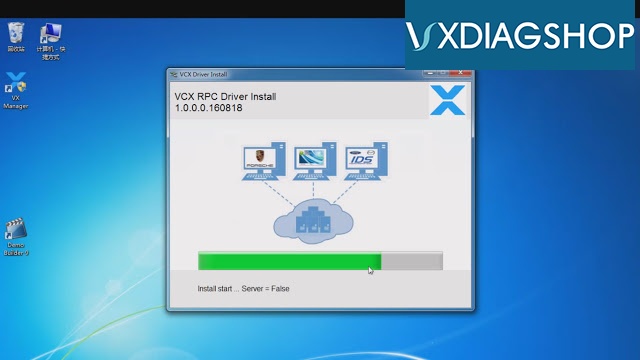
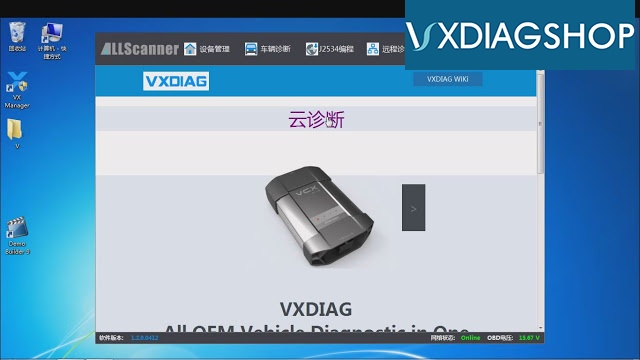
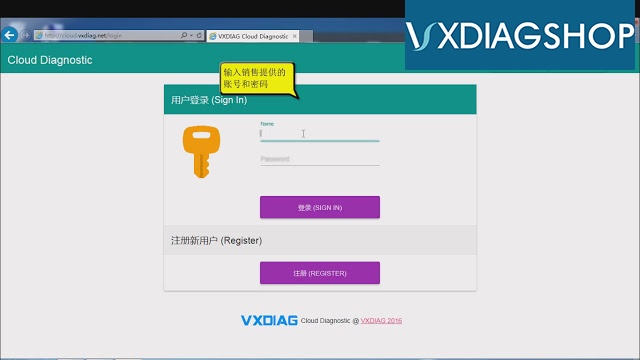
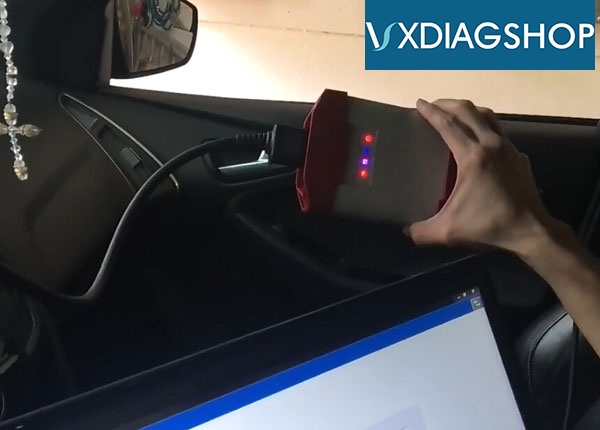
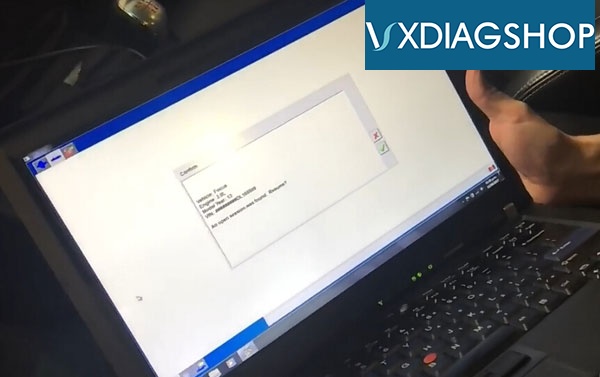
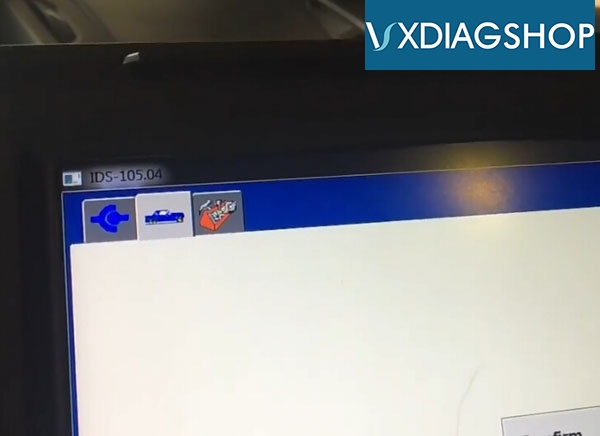
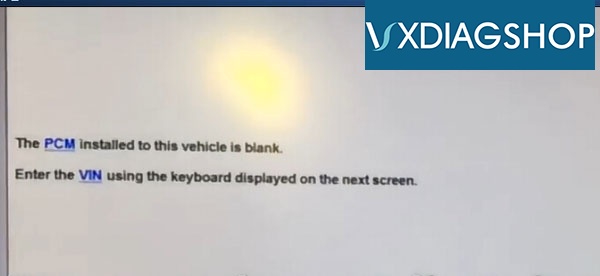
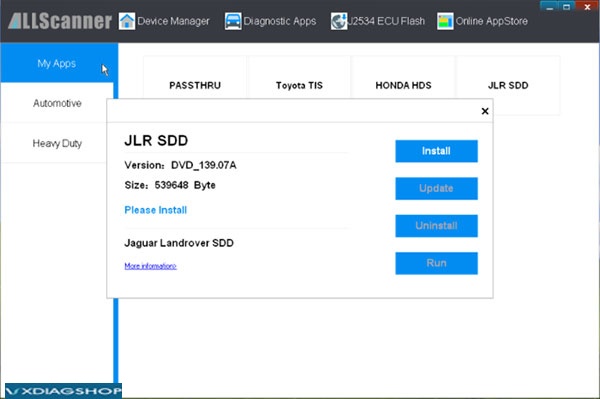
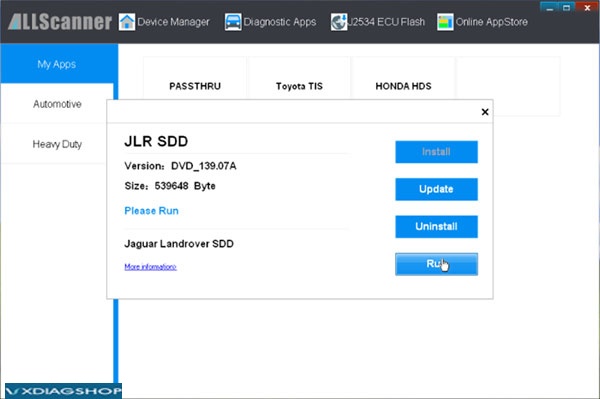
Here is the tutorial for reference.


2018/11/27

Free Download ODIS V4.4.10 for VXDIAG VCX NANO

VAG Audi VW ODIS 4.4.10 Crack Software with ODIS Engineering 8.2.3 postsetup free download for VXDIAG VCX NANO ODIS diagnostic scanner.


Free Download ODIS V4.4.1.0 and PostSetup 8.2.3
https://xhzdxhtbsteduau-my.sharepoint.com/:f:/g/personal/20130970_shanlin_club/EoK4JQ3uAB5FnL2we600LxkBaOuTfnDWIpaE0FWJyylcAA?e=fbVWjq
ODIS-4.4.10-software
Multi-language: English/Japanese/Portuguese/Romanian/Korean/Dutch/Polish/Turkish/Spanish/ French/Italian/Croatian/Danish/German/Swedish/Finnish/Slovenian/Czech/Russian/Greek/Chinese
Software containing:
ODIS-4.4.10-software-1
ODIS-4.4.10-software-2
Computer Windows System Requirements:
 
WIN 7 32 bits/WIN 7 64 bits
System C: // have to be NTFS format
C: // need to have at least 40GB space for installing ODIS


VXDIAG ODIS 4.4.10 Software New Functions:
– Estimated remaining times are shown for ECU flash operations.
– Diagnostic protocol contains interruptions of GFF sessions, extended measurement values, improved ECU communication view, used diagnostic hardware, connection type of diagnostic hardware, operating system, the hotfix used and submissions of support requests
– The measured value display has been improved.
– Documents in GFF are displayed in separate windows.
– One message box will be shown at the beginning of the test drive mode.
– GFF hotfixes can be integrated during diagnostic sessions.
– Danger messages have been revised.
– Stopping of diagnostic sessions may be interrupted.
– Automatic deletion of autosave diagnostic protocols after successful transmission.
– Selection of PassThru diagnostic hardware has been


Odis 4.4.10 Windows 7 installation tips:
  1. Install Odis only WIN 7 32 or WIN 7 64! ! ! ! Do not restart at the end ! ! !2. Copy +Paste OffboardDiagLauncher.exe to “Program Files (X86) > Offboard_Diagnostic_Information_System”
    3 .Copy “de.volkswagen.odis.vaudas.launcher_4.44.1.jar “ to “Program Files (X86) > Offboard_Diagnostic_Information_System\plugins”
    4. For Win 7 32 . Extract “Odis 4.4.10 Program x86.rar “ to ! ! ! “PROGRAM FILES (X86)” ! ! !
    5. For Win 7 64 . Extract “Odis 4.4.10 Program x86.rar “ to ! ! ! “PROGRAM FILES (X86)” ! ! ! AND Extract “Odis 4.4.10 Prgram Files.rar “ to ProgramData
    6. RESTART
    7. Do not start Odis
    8. Start > Edic Conf. Manager with USB and with Bluetooth
    9. Is detected 5054 start odisEnjoy!
http://www.vxdiagshop.com

2018/11/26

How to do Ford ECU programming online

This is Ford IDS how to register an programming account , what kind of Ford diagnostic tool should use and how to use it for Ford ECU programming online.

I am using VXDIAG VCX NANO Ford, AllScanner

Go to J2534 Programming
Http://www.motorcraftservice.com/ FORD Motorcraft Service
The official site to register my account

Online programming account only
Have good success on 2005 Ford Escape 3.0 V6
PCM programming online zero issues!!!
P.S, tips i followed:
How to do FORD PCM PROGRAMMING:
scope & scan scopes PCM Ford PCM vehicle diagnostics repair shop training technician training automotive aftermarket
Programming Ford electronic control units (ECUs) is pretty straightforward and simple compared to many other OEMs. However, Ford does do one thing differently than most other OEMs. The normal Ford programming procedure has you "inhale" (read and store) the As Built data from the old ECU to the scan tool so that these As Built vehicle specific production and calibration details can then be transferred to a new, remanufactured or salvaged ECU you are installing.
A complication arises when you are attempting to replace an ECU that is dead or not communicating with the scan tool or programming device. In this instance, you are going to have to use a different method of telling the replacement ECU what the needed As Built data information should be. The Ford recommended procedure for this is stated as:
"Programmable Module Installation (PMI) must be performed when replacing module. If the information cannot be inhaled from the original module, As-built data must be used to properly configure module"
This procedure requires purchasing a per use subscription for all ECUs, except the PCM, from the Ford Motorcraft website, http://www.motorcraftservice.com. Once purchased you use the vehicle identification number (VIN) to acquire the As Built data for the particular ECU you are replacing. This As Built data is actually multiple lines of hexadecimal numbers entered into dialogue boxes in the programming software. We will describe this process for Ford ECUs in next month's column. For this months column we will describe a quicker method than acquiring the As Built hex info to install a replacement powertrain control module (PCM) in a Ford vehicle where the old PCM is damaged and not communicating. All we need do is tell a little white lie to the scan tool or programming device!
To accomplish this trick, connect your Ford diagnostic tool or Flash programming device to the diagnostic link connector (DLC). Leave the ignition key in the OFF position. While the key is off, attempt to connect with the vehicle using your tool's software. The programming software will show a status bar for 45 seconds while it attempts communication with the vehicle. Of course, the communication attempt will fail because the key is off! It will then ask you to turn the key off and on again as it again attempts to communicate with the vehicle. After this process completes the software will ask you if you want to make another attempt. Choose no to this query.
You are then asked to choose from a list of vehicles to communicate with. Typically, your choice on this page will be "all other" shown on the top of the list as the rest of the list are non-domestic vehicle models
.
The software will explain that you must provide some numbers from the actual ID label on the old PCM in order for the software to identify the vehicle you intend to communicate with. Use the actual PCM's label shown here if Figure 1 to gain the information you need. As you can see in screen shot shown in Figure 2, there are three sets of data fields you can use. You need only use one of these data fields to get the job done. I use the Tear Tag number because it is the easiest. In our example, we take the YPZ2 shown on the PCM label in figure 1 and type it into the Tear Tag data field as shown in Figure 2.

The next screen shown will ask you to enter the VIN and mileage. This VIN information is important if your state has an OBDII inspection program requiring a VIN read from the DLC for positive vehicle identification purposes so do not skip this step.
Once the vehicle is properly identified as shown in Figure 3, you can use the normal PCM replace and program procedure. You may be asked to provide a couple of other pieces of information like tire size or whether the vehicle has four-wheel drive or not.

You also might need to perform a reset or relearn of the PATS vehicle security system if the vehicle is so equipped. This might require the presence of two transponder type security keys depending on the system the vehicle is equipped with. You can find this information for your particular vehicle as well as the methods needed to program the PATS security system by using the free downloadable guide located at http://www.motorcraftservice.com/vdirs/retail/pats_job_aid.pdf

www.vxdiagshop.com

2018/11/25

VXDIAG VCX HD Heavy Duty Scanner configuration

Allscanner VXDIAG VCX-HD is PC-to-vehicle interface compatible with multiple heavy duty OEM software applications, minimizing your investment in multiple brand-specific diagnostic interfaces.
vxdiag-vcx-hd
Supported Protocols and Standards
RP1210 ProtocolsJ2534 ProtocolsStandardsOther Protocols
  • J1939
  • J1708 / J1587
  • CAN
  • J1850 (VPW - GM)
  • ISO15765
  • ISO9141 / KWP2000
  • ALDL
  • CAN (Raw CAN)
  • J1850 VPW (GM Class II)
  • ISO 15765-4
  • GMLAN (HSCAN, SWCAN)
  • ISO 14230 (KWP2000)
  • ISO 9141-2
  • J1708/J1587
  • J1939
  • TMC RP1210B
  • TMC RP1210A
  • SAE J2534
  • SAE J1979
  • VEPS J2214 / J2461
  • CE Compliant
  • FCC/IC Certified
  • GMLAN
  • J2284 (CAN @500k)
  • J2411 (GM SWCAN)
  • ISO9141 / KWP2000
  • ALDL
RP1210 OEM Diagnostic Software Compatibility
RP1210A compliant and should work with any RP1210A compliant application. It has been thoroughly validated against the following OEM and component applications:
  • Allison DOC
  • Bendix ACOM
  • Caterpillar Electronic Technician
  • Cummins Insite
  • Cummins PowerSpec
  • Detroit Diesel Diagnostic Link
  • Detroit Diesel Reprogramming Station
  • Eaton ServiceRanger
  • Freightliner ServiceLink
  • International Diamond Logic Builder
  • International InTune
  • International Master Diagnostics
  • International ServiceMaxx
  • Mack VCADS/PTT
  • Meritor-WABCO Toolbox
  • Volvo VCADS/PTT
  • ZF-Meritor TransSoft

Configuring Applications to Use the Allscanner VXDIAG VCX HD. The following examples show how to select your VCX HD device using the USB cabling method.
Allison DOC 8.0.0
  1. Start program.
  2. Click Connect to Vehicle.
  3. Select the Correct Transmission Type.
  4. Uncheck Smart Connect.
  5. Click Connect.
  6. Click Advanced Setup.
  7. Select vendor of VCXRP32 Single Application.
  8. Select protocol of J1939 or J1708.
  9. Select correct device of VXDIAG, USB
  10. Click OK.

Bendix ABS Diagnostics 6.3 v1.2.19.1
  1. Start program.
  2. Click on Communication device options, A. Select RP1210, A Device Using J1708 Line: VXDIAG (VXDIAG, USB)
  3. Click OK.
Caterpillar Electronic Technician 2014A
  1. Start Program.
  2. Click Utilities  Preferences  Modify
  3. Click on Communication Interface Device dropdown box.
  4. Select Caterpillar Comm Adapter 3 (RP1210) or Caterpillar Comm Adapter II (RP1210)
  5. Click OK
Cummins Insite 7.6.0.272
  1. Start Program.
  2. Click on File  Connections  Add New Connection.
  3. Click Next.
  4. Select RP1210 Adapter, click Next
  5. Select Vendor of VXDIAG and Adapter of VXDIAG, USB, and protocol you want to use, J1708/J1939.
  6. Click Next and a Connection Name screen appears.
  7. Click Next and a screen prompts you to indicate whether you want to make this connection active or set up another connection.
  8. Click on make this connection active.
  9. Click Finish
Detroit Diesel Reprogramming System  07.09.2013
From Windows Start Menu
  1. Start  Programs  Detroit Diesel  Reprogramming System  SID configure
  2. Select VXDIAG, USB
  3. Click OK.
From Inside DDDL
  1. Tools  Options  Connections Tab  SID Configure. 2. Select VXDIAG, USB.
  2. Click OK.
Eaton ServiceRanger 3.x   3.2.2.1037
  1. Start Program
  2. Click Eaton  ServiceRanger 3  Tools . Settings Connection
  3. Under Communication Driver Information
  4. Select VXDIAG, USB for both the J1587 and J1939 device.
  5. Click OK.
Electronic Service Analyst 4.2.0.142   ESA (Kenworth/Peletbilt)
  1. Start Program
  2. Click ESA  Tools . Admin
  3. General Manufacturer DLA
  4. Select NEXIQ USB-Link
  5. Click OK.

Freightliner ServiceLink   4.93.408.0
  1. Start ServiceLink Offline
  2. From the top menu bar, choose Admin.
  3. From the left menu bar, choose Vehicle.
  4. Click on Show All Devices.
  5. In the Vendor box, choose VXDIAG Single Application.
  6. Select VXDIAG, USB in the J1939 and J1708 drop down items.
  7. In the CAN Device item, select the Configure button and choose VXDIAG, USB from the SID Configuration window.
  8. Click Save Settings.
Hino Diagnostic eXplorer   3.1.2
  1. Start Hino Diagnostic eXplorer
  2. Diagnosis-login to input Password which you setup during software installation, click OK
  3. Click Option(S), select communication (A), select VXDIAG, to click Config.exe
  4. Click OK
Hino Reprog Manager    3.1.2
  1. Start Hino Reprog Manager
  2. Reprogram-login to input Password which you setup during software installation, click OK
  3. Click Option(S), select communication, select VXDIAG, to click Config.exe
  4. Click OK
International Truck and Engine
Diamond Logic Builder (DLB)   5.2.0.0
  1. Start MD32 DLC.
  2. Choose File  MD Settings COM Device
  3. Select VXDIAG VXDIAG, USB
  4. Click OK
Master Diagnostics (MD Fleet)   5.2.0.0
  1. Start MD32 3BX
  2. Choose File  MD Settings COM Device
  3. Select VXDIAG VXDIAG, USB
  4. Click OK
Diamond Logic Controller II     5.2.0.0
  1. Start MD32 DLCII.
  2. Choose File  MD Settings COM Device
  3. Select VXDIAG VXDIAG, USB
  4. Click OK
Meritor-WABCO ABS Toolbox    8.0.0
  1. Start Meritor WABCO PC DIAGNOSTICS
  2. Click System Setup; then select COM Port.
  3. Select VXDIAG Single Application; the protocol to use is J1939 or J1708.
  4. Select VXDIAG, USB and click OK.
PERKINS OF EST       2010B v1.0
  1. Start Electronic Service Tool
  2. Click Utilities to select Preferences
  3. Click Communications to select RP1210 Compliant Device, then to click Advanced to select VXDIAG, USB (1)-VXDIAG
  4. Click OK.

Volvo/Mack Premium Tech Tool (PTT) 1.12
  1. Start Program, input User ID of m333422 or m311331, select Work offline, and click OK
  2. Select Settings from the PTT menu.
  3. Go to the Communication Units configuration tab, select RP1210B adapter
  4. Click OK
http://www.vxdiagshop.com

2018/11/23

Reprogrammed GM Navigation Radio & Reset VIN with VXDIAG GM

Here's the customer review from a VXDIAG user.

Topic: Successfully reprogrammed a GM navigation radio & reset the VIN.
 
vxdiag-vcx-nano-gm
I purchased the VCX NANO to program a used GM Navigation radio. The donor radio came from a 2012 Tahoe & I was installing it in my 2013 Silverado. Since it came from a different vehicle with a different VIN, the radio displayed "LOCKED" because the VIN programmed in the donor radio did not match the VIN in the BCM of my truck. Also, the speaker options, backup camera, rear entertainment options, etc were different on my truck & the radio needed to be programmed for my truck's specific setup. Following is a description of the device, software, & how I used it.
The device itself is a good replica of the GM Bosch MDI2 Interface & J2534 Programmer. This is the device that GM uses to interface with their modern vehicles but is backwards compatible to older vehicles. It has the ability to connect to the various modules inside the vehicle (door switch, BCM, ECM, RADIO, remote key entry, & more), read module information, reset fields, & program the module if used with an AC Delco Service & Programming Subscription (SPS).
Also included in the box is a CD with replica GM software; Tech2Win, GDS2, GM MDI Manager, & VCX Manager. The Tech2Win is an emulator for the old GM Tech2 handheld device that was in use from the mid 90’s up until about 2013. It can run standalone by itself. Global Diagnostics 2 (GDS2) replaces the Tech2 & is what dealerships use for troubleshooting today. GDS2 is a subscription service, but here it is packaged into a virtual machine that the seller has created, allowing GDS2 to run without buying a subscription from AC Delco. I don’t think the GM MDI Manager is used, but the VCX Manager has to be open for the other software to work correctly. I think it provides the interface to trick the software into working with cloned hardware. All of the software is cloned GM stuff & has been altered to allow it to run the GM MDI clone.
Not included on the CD is the ability to do any programming of new or used modules. To program, you have to get a subscription from AC Delco TDS which allows you download & flash the programming calibration files. The subscription you’re looking for is a Service & Programming Subscription (SPS). I paid $40 for 24 month access, but it only allows programming of 1 specific vehicle, and is $40 per each vehicle you wish to program. The programming is done through a Java based app, & I ended up turning off every security feature under the Java control panel to get it to run. Using the programming Java app, I was able to update the used radio to match my truck’s specific RPO codes. However, the radio was still locked since the VIN in the radio didn’t match the truck.
Here is where I got stumped for a bit. GM released a bulletin in 2008 (#PIT4007D) that basically said to use a Tech2 to invoke the built in VIN relearn command on radios that had been programmed but still had the old VIN. The only catch was that no matter what radio you were trying to reset, you had to select the options on your Tech2 for a 2006 Chevrolet Monte Carlo LTZ to invoke the relearn VIN command. I tried with the included Tech2Win software but the command was not there, it was as if it had been removed. On a hunch, I searched for an older version of Tech2Win, downloaded it, and the relearn VIN option was there! It worked, I was able to remove the old VIN allowing the radio to marry to the new VIN. The included version was NAO V33.004 but the older version that allowed for VIN reset was NAO V30.004. I suspect GM purposely removed the VIN relearn command from the updated versions of Tech2Win to force you to go to the dealer for special VCI programming that’s only available after calling the GM Techline for dealers.

SUMMARY

I have left out a lot of steps that were necessary to get the VXDIAG GM software running correctly. I would recommend you only install it on an old computer that has no personal information, considering how all of the software provided is cloned software that instructs you to disable any firewalls\antivirus. However, once you get the software installed & running correctly, it’s an excellent device for diagnostics, maintenance, & programming.

http://www.vxdiagshop.com

How to use VXDIAG Cloud Diagnostics Function?

The tutorial will show you how to use VXDIAG Cloud Diagnostics. Just use your VXDIAG VCX NANO or VXDIAG Multi diagnostic tool. (No need install any software on PC)
vxdiag-cloud-diagnostics-1
Why to use VXDIAG Cloud Diagnostics?
You don’t have to install any OEM software on PC. You can login cloud diagnostic server and diagnose your car directly online after connecting interface to laptop and car. Isn’t it cool?
What you should know about VXDIAG Cloud Diagnostics?
VXDIAG Cloud Diagnostics can work on all VXDIAG VCX NANO interfaces and VXDIAG Multi diagnostic tools.
Free download VX Manager 1.2.0.0905: (Needed for VXDIAG Cloud Diagnostics)
https://mega.nz/#!esxVxIzb!h3CJbcyNG0u1OE_Tam978pygzfuKktQMrRCDcM9E0H8
VXDIAG Cloud Diagnostics laptop requirements: Win 7, Win 8 or Win 10 OS systems (Win XP is not supported); Explorer 11 or Google chrome (For login cloud diagnostic server http://cloud.vxdiag.net)

How to use VXDIAG Cloud Diagnostics?
Part 1. Set up VX Manager Driver
Part 2. Login VXDIAG cloud diagnostic server and start diagnosis.
Step 1. After installed VX Manager, double click the icon. It will pop up an interface, choose “I accept the agreement”, click “Next”, then “Next”. Wait for a minute it will show “VCX SDK Driver Install”, after that click “Finish”.
vxdiag-cloud-diagnostics-2
vxdiag-cloud-diagnostics-3
Step 2. Double click the “VCX Manager” shortcut, click “Cloud Diagnostics”
vxdiag-cloud-diagnostics-4
Then it will pop up a website for login. Input name and password (You can ask the sales),
vxdiag-cloud-diagnostics-5
Step 3. After login, you can choose whichever car brand to start cloud diagnosis.
vxdiag-cloud-diagnostics-6
For example, choose “Mazda” and click “Open Cloud” (During diagnose process if there is any pop-up connect question please always choose “connect” and “yes”)
vxdiag-cloud-diagnostics-7
You can see the detailed information of your interface.
vxdiag-cloud-diagnostics-8
Step 4. Double click the “Mazda IDS” icon on desktop. Choose “Open a new dialogue program” then it will show “Communicating to PCM”. After that you can start VXDIAG Cloud Diagnostics by VXDIAG VCX NANO or VXDIAG Multi diagnostic tool now!

http://www.vxdiagshop.com

2018/11/21

VXDIAG Ford Multi Tool works with original IDS License

VXDIAG VCX Plus Ford multi tool is verified working no issue with original IDS license.

Tested model:
Ford Focus year 2013 2.0L gasoline

Intention:
Reprogram PCM after replacement and program PATS key
vxdiag-ford-original-ids-1
Connect VXDIAG Ford VCi with vehicle via OBD socket
vxdiag-ford-original-ids-3
Read vehicle information
vxdiag-ford-original-ids-4
Select module programming
vxdiag-ford-original-ids-2
vxdiag-ford-original-ids-5
The PCM installed to this vehicle is blank. Enter the VIN on the next screen
vxdiag-ford-original-ids-6
Gathering vehicle data
Turn on ignition switch
PCM Module programming in progress
vxdiag-ford-original-ids-7
Turn ignition to the ON position
vxdiag-ford-original-ids-8
ford-focus-2013
Enter PATS Security access
vxdiag-ford-original-ids-9
Advanced key code Erase and Program
Program additional key
Parameter reset (BCM and PCM)
Parameter reset (BCM and RFA)
Program additional transponder key (for remote start installations only)
vxdiag-ford-original-ids-10
You will need 2 keys to start the vehicle
vxdiag-ford-original-ids-11
Program first transponder key
Put key in slot on steering column
vxdiag-ford-original-ids-13
vxdiag-ford-original-ids-12
Operation success
vxdiag-ford-original-ids-14
Follow same step to program next key until success
Check vehicle information and test the new key.
vxdiag-ford-original-ids-15
vxdiag-ford-original-ids-16
VXDIAG is compatible with original diagnostic software and newer vehicles. You can purchase license from Ford or vxdiagshop.com.

2018/11/20

How to setting VXDIAG Multi Tool Porsche PIWIS II LAN

How to: setup VXDIAG Porsche PIWIS II Multi diagnostic tool LAN connection.

1.Click [SETTINGS]->[Network settings]
vxdiag-piwis-ii-lan-setting-1
vxdiag-piwis-ii-lan-setting-2
2.Click [LAN],then Select a network card
vxdiag-piwis-ii-lan-setting-3
vxdiag-piwis-ii-lan-setting-4
3.obtain ip address automatically:select [Obtain IP address automatically] and [Obtain DNS server address automatically],then click [Save]
vxdiag-piwis-ii-lan-setting-5
vxdiag-piwis-ii-lan-setting-6
4.Manually settings IP address : select [Use following IP addresses] and [Use following DNS server addresses],then input IP address 、subnet mask 、standard gateway 、Preferred DNS Server , then click [Save]


Video : WIFI Settings - obtain ip address automatically


2018/11/19

VXDIAG Porshce PIWIS2 WLAN Connection Setting Method

How to setup VXDIAG Porshce PIWIS2 WLAN wireless Connection?

1.Click [SETTINGS]->[Network settings]
vxdiag-porsche-wlan-setting-1
vxdiag-porsche-wlan-setting-2
2.Click [WLAN],then Select a network card
vxdiag-porsche-wlan-setting-3
3.Click [Search],then click select Network name,and input Network Key
4.obtain ip address automatically:select [Obtain IP address automatically] and [Obtain DNS server address automatically],then click [Save]
vxdiag-porsche-wlan-setting-4
5.Manually settings IP address : select [Use following IP addresses] and [Use following DNS server addresses],then input IP address 、subnet mask 、standard gateway 、Preferred DNS Server , then click [Save]
vxdiag-porsche-wlan-setting-5
Video
[embed]https://youtu.be/aATCNX0hd1E[/embed]
http://www.vxdiagshop.com

2018/11/18

VXDIAG Multi Tool Subaru SSM-III Scanner Review

I have the VXDIAG Subaru off vxdiagshop.com. The only time it came in handy was when i used it to recalibrate the steering angle sensor. The software was a pain to get setup and working properly.

It definitely does more than a regular scanner (FreeSSM cable), but I rarely use those features. In fact, you don’t need a scanner at all to access DTCs and ABS codes. Just plug the diagnostic connectors together and do a couple other things that I can’t remember and the codes will flash in the gauge cluster.
It just depends on if you think having complete access to all the systems in the car is worth it. It’s nice to have when I need it. I had a VDC code that was for the steering angle sensor. Rather than go to the dealer, I just busted out the knock off SSM and calibrated it in the driveway.
Some things I couldn’t get to work. I tried to reprogram a new key with it, but you need a code from the dealer. I also messed up my TPMS. I was messing around and accidentally cleared the calibration. To recalibrate them you need a special tool that puts the sensors into learning mode. I never could find a reasonably priced tool that was verified to work with my sensors.
So, if you feel all the features are worth it then you’ll like it. At this point it’s just a novelty for me. I haven’t used it in a long, long time. I posted up a screen shot of the menu for SSM III, so you can see all the different things you can access.
Another thing to consider is that it is a pain to get to work. SSM requires a code to gain access. I had to search all over the internet to figure out how to get it working properly. It’s been so long I can’t remember exactly how I did it. I still get error codes when trying to connect to my car, but it connects just fine.
Subaru-SSM-3-review-1
Subaru-SSM-3-review-2

2018/11/16

How to Install VXDIAG Scanner OEM Diagnostic Driver

VXDIAG diagnostic scanner OEM driver Installation:
Please make sure the network is connected or error.
install-vxdiag-oem-driver-1
1.VX Manager can manage multiple original diagnosis functions.
install-vxdiag-oem-driver-2
2. To use the original factory diagnosis functions, you will need to buy corresponding License and install corresponding vehicle diagnosis driver. For example Installation JLR SDD driver.
Click [Diagnostic Apps] -> [My Apps], then click [JLR SDD] and you will get
a driver installation window.
install-vxdiag-oem-driver-3
3. Click [Install],VX Manager will download the newest diagnostic driver from server and install, then you can start to use the original diagnosis function. The installation UI is below:
install-vxdiag-oem-driver-4

Update OEM driver (For example Update JLR SDD):
1. Click [Diagnostic Apps] -> [My Apps], then click [JLR SDD] and you will get a driver Update window. Click [Update]
install-vxdiag-oem-driver-5
2. VX Manager will download the newest diagnostic driver from server and install
install-vxdiag-oem-driver-6