Showing posts with label VXDiag VCX NANO Mazda. Show all posts

2024/03/17

VXDIAG VCX NANO Mazda RX8 PCM Replacement

DIY tutorial: Mazda PCM/ECU replacement and reprogramming using vxdiag vcx nano Ford/Mazda scanner.

Model example: 2005 series 1 automatic rx8


Tools you will need:
current car pcm
Ford VCM obd scanner (vxdiag vcx nano ford/mazda is the one i use)
Mazda iDS (install guide and download link here)
incode by outcode app (Play Store Link FREE)
a used or new replacement pcm
2 key fobs


Procedure:

plug in the vxdiag vcx nano mazda scan tool to the obdII port under the steering wheel

VXDIAG VCX NANO Mazda RX8 PCM Replacement  1

Open iDS and select start new session>all other

VXDIAG VCX NANO Mazda RX8 PCM Replacement  2

it will read your pcm and recognise your vehicle

VXDIAG VCX NANO Mazda RX8 PCM Replacement  3

if you have dsc select yes

VXDIAG VCX NANO Mazda RX8 PCM Replacement  4

advanced keyless entry > select correct option for you

VXDIAG VCX NANO Mazda RX8 PCM Replacement  5

Check vehicle information and then continue

VXDIAG VCX NANO Mazda RX8 PCM Replacement  6

enter odometer reading if you want to (not required)

VXDIAG VCX NANO Mazda RX8 PCM Replacement  7

select module programming

VXDIAG VCX NANO Mazda RX8 PCM Replacement  8

select programable module installation > pcm

VXDIAG VCX NANO Mazda RX8 PCM Replacement  9

set ignition to on

set ignition back to off when prompted

VXDIAG VCX NANO Mazda RX8 PCM Replacement  10

VXDIAG VCX NANO Mazda RX8 PCM Replacement  11

Install a new module in vehicle. when this prompt comes up unplug your pcm and plug in the replacement

VXDIAG VCX NANO Mazda RX8 PCM Replacement  12

Take off the cover and undo all the bolts holding the pcm down. disconnect the air tubes at the front of the pcm

VXDIAG VCX NANO Mazda RX8 PCM Replacement  13

unplug these 4 connectors on the back of the pcm

VXDIAG VCX NANO Mazda RX8 PCM Replacement  14

set ignition to on

set ignition back to off when prompted

VXDIAG Mazda IDS will rewrite the data on the new pcm from your old one

VXDIAG VCX NANO Mazda RX8 PCM Replacement  15

set ignition back to on

set ignition to off again

Programming complete. if you cannot crank your car now you will have to run the pats function.

VXDIAG VCX NANO Mazda RX8 PCM Replacement  16

Go to body>security>PATS

VXDIAG VCX NANO Mazda RX8 PCM Replacement  17

follow on screen instructions then set ignition to on

VXDIAG VCX NANO Mazda RX8 PCM Replacement  18

select ignition key code erase and reprogram

VXDIAG VCX NANO Mazda RX8 PCM Replacement  19

download incode by outcode on google play store

VXDIAG VCX NANO Mazda RX8 PCM Replacement  20

check that vin is correct before continuing

VXDIAG VCX NANO Mazda RX8 PCM Replacement 21

this page has the OUTCODE you need. put that code into the incode by outcode app then press next when the app gives you an incode

VXDIAG VCX NANO Mazda RX8 PCM Replacement  22

put that outcode into the incode by outcode app and get your incode

VXDIAG VCX NANO Mazda RX8 PCM Replacement  23

type in incode provided by app

VXDIAG VCX NANO Mazda RX8 PCM Replacement  24

if it worked you get this screen

VXDIAG VCX NANO Mazda RX8 PCM Replacement  25

You will need 2 keys to start vehicle. After this page its pretty simple. Just follow on screen instructions until complete then you will have a working rx8 with a new pcm installed.

 VXDIAG VCX NANO Mazda RX8 PCM Replacement  26

The tutorial might work on older Mazda, for newer models, you may need Mazda MDARS. The vxdiag vcx nano mazda can also be used as a J2534 passthru device with MDARS.

How to Reprogram New Mazda PCM with MDARS?

2022/01/16

VXDIAG VCX Mazda IDS Diagnose CX-5 2012

He saved and saved and saved. I was periodically tormented by a stupid error message about the charge optimization system on the Mazda CX-5 (1G) Engine 2.0 petrol (150 hp) 2012. Found the device a clone of the original official device IDS for relatively less money vxdiag vcx nano for ford/mazda.

VXDIAG VCX Mazda IDS Diagnose CX-5 2012 1

VXDIAG VCX Mazda IDS Diagnose CX-5 2012 2

VXDIAG VCX Mazda IDS Diagnose CX-5 2012 3

VXDIAG VCX Mazda IDS Diagnose CX-5 2012 4

There are official representatives, and there are sellers with Aliexpress. In the first case, they give all guarantees that the device is original + full support, but take a bit more than Ali. In the second case, it is cheaper, but you can get it without a guarantee and support. So i decided to order it from vxdiagshop.com. Download and install the Mazda IDS software, a patch, and drove it into the car.
Software took here www.vxdiagshop.com/info/download/
First I looked at the auto settings, parameters, went into programming, the program gave a message that there was a new pcm firmware version L, in fact, this was what I needed, I had G.

VXDIAG VCX Mazda IDS Diagnose CX-5 2012 5

Launched the firmware. Of course, it was scary to screw up the module, but everything went well, I waited for about 5 minutes. I will test and watch the battery charge.
There was no update on the box and the rest of the modules.

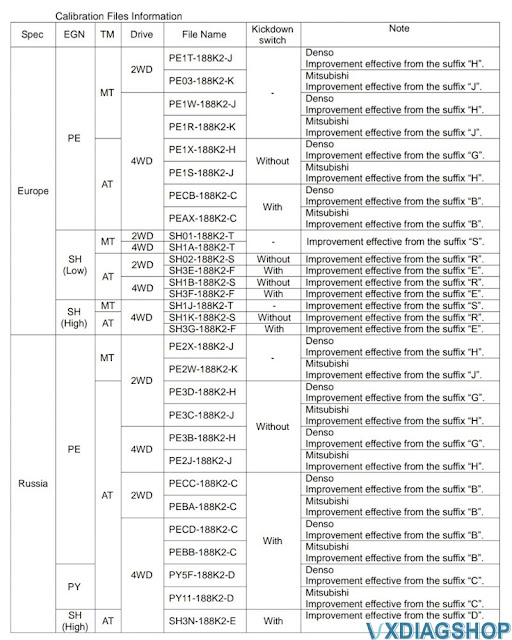
I am attaching a table from the bulletin on charge optimization.

VXDIAG VCX Mazda IDS Diagnose CX-5 2012 6

2021/10/10

How to Reprogram 2019 Mazda 3 PCM with MDARS?

Here is the new 7th generation Mazda PCM reprogramming procedure with MDARS (Mazda Diagnosis and Repair Software).


Model example: 2019 Mazda3


What you will need:

MDARS subscription (check more information here)

J2534 passthru that compatiblew ith MDARS, i.e vxdiag vcx nano for Mazda


Service Caution for reprogramming:

  • After the reprogramming, verify the calibration file name with the chart below at screen of the (PCM) FILENAME.
  • Clear the DTC and turn the ignition off and get out of the car.
  • Close and lock the door.
  • Wait for ten minutes or more. IF YOU DON’T WAIT AT LEAST 10 MINUTES YOU WILL HAVE A COMMUNICATION ERROR WITH THE FORWARD SENSING CAMERA. DTC U2120:00 is stored and i-ACTIVSENSE AMBER warning light is illuminated
  • Verify the repair by starting the engine and making sure there is no MIL illumination or abnormal warning lights present.
  • Poor connection between the vehicle and MDARS and/or low voltage may result in abnormal termination and/or data corruption.

NOTE: • If the calibration file is with the suffix in the table or later, the PCM already has the modified calibration.

PCM File Name Note
PX05-188K2-J AT, 2WD,PYUD,Melco
PX07-188K2-L AT,4WD,PYUD,Melco
PX58-188K2-H MT,2WD,PYUD,Melco
PX13-188K2-D AT,2WD,PYUD,Melco
PX06-188K2-J AT,2WD,PYUD,Denso
PX08-188K2-L AT,4WD,PYUD,Denso
PX59-188K2-H MT,2WD,PYUD,Denso
PX14-188K2-D AT,2WD,PYUD,Denso


Preparation:

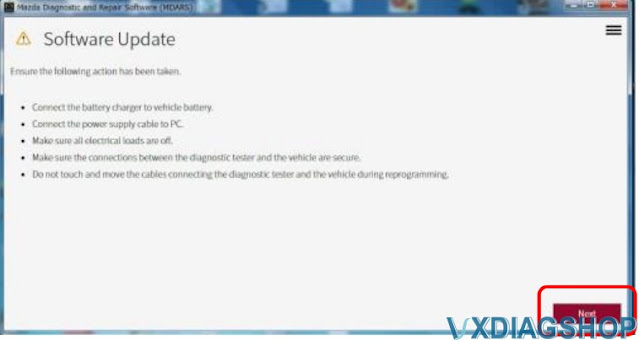
a. Make sure that the following connections are firmly connected, and then do NOT touch the VCM and DLC cable to prevent from causing noise and poor connection.
– Between the vehicle-side connector and the DLC cable
– Between the PC-side connector and USB port of PC

b. Connect AC adapter to the PC in order to stabilize voltage fluctuation during reprogramming
Do NOT use vehicle battery outlet as power source for the PC.

c. During reprogramming, connect battery charger (charge current maintained within 10 to 15A) to the vehicle to stabilize voltage fluctuation.


Before reprogramming, pay attention to the vehicle condition and PC environment.


a. Turn off all the electrical loads, especially pay attention to A/C (blower), audio, rear defogger and headlights.
b. Perform self-test and verify no DTC is stored. If any DTC is stored, fix the concern and delete the DTC.
c. Disconnect all non-genuine aftermarket accessories.
d. Terminate all programs other than MDARS on the PC. This may extend reprogramming,
PC may freeze or it may cause other problems.
e. Perform reprogramming under proper Internet environment. Especially when using wireless network, make sure the connection is strong.
f. Make sure to keep proper free space on the PC’s hard disc. Insufficient free space (less than 1 GB) may result in PC freeze during reprogramming.


PCM Reprogramming Procedure:

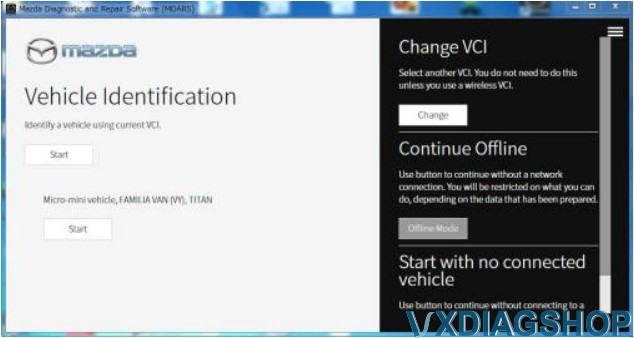
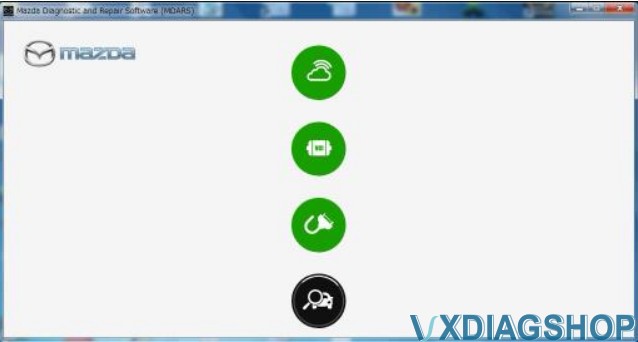
1. Log in to the MDARS and select “Launch M-MDS” button.

Reprogram 2019 Mazda 3 PCM with MDARS 1

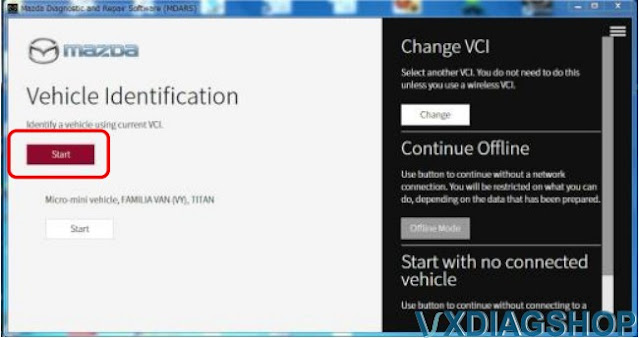
2. Ignition on the vehicle and select “Start” and wait

Reprogram 2019 Mazda 3 PCM with MDARS 2

Reprogram 2019 Mazda 3 PCM with MDARS 3

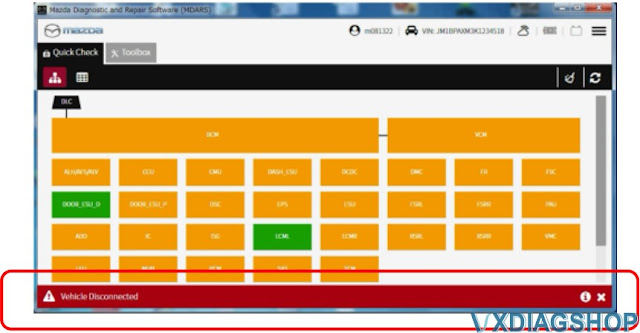
The deployment modules are displayed after the vehicle identification was completed.

Note: “Vehicle Disconnected” is displayed at the time of communication error.

Reprogram 2019 Mazda 3 PCM with MDARS 4

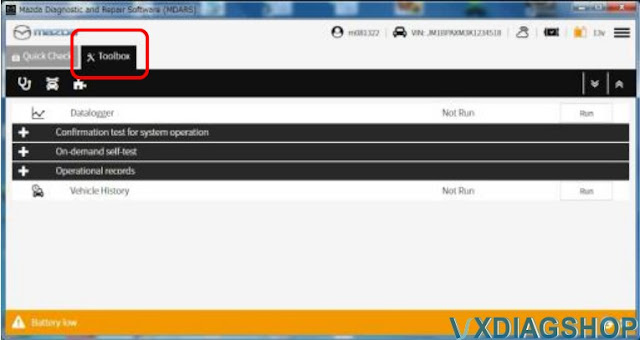
Select “toolbox”

Reprogram 2019 Mazda 3 PCM with MDARS 5

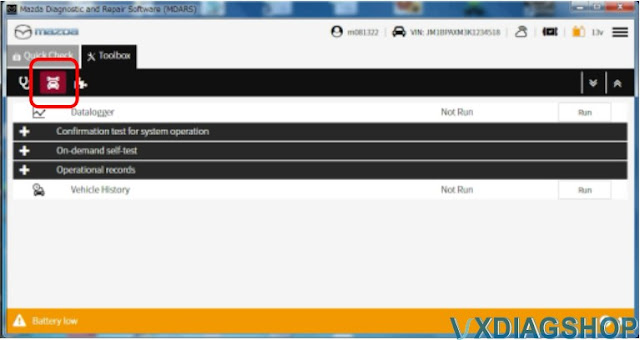
Select the following icon.

Reprogram 2019 Mazda 3 PCM with MDARS 6

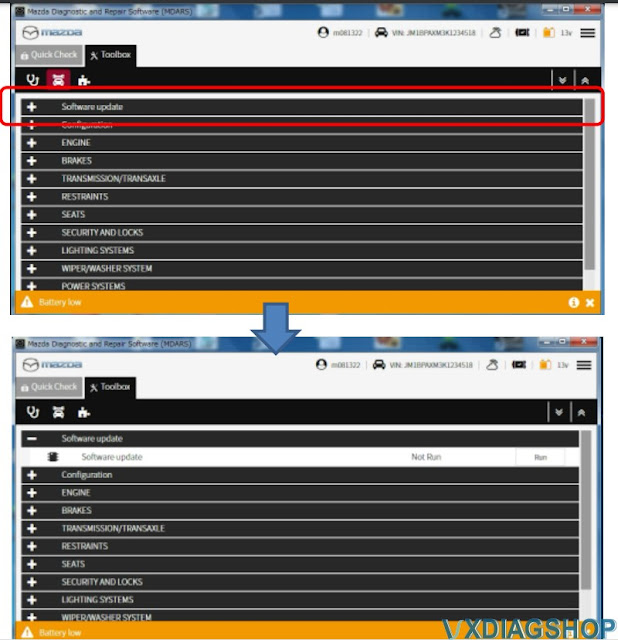
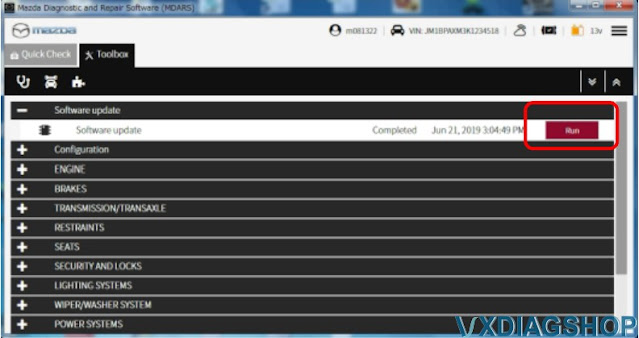
Select “Software update”.

Reprogram 2019 Mazda 3 PCM with MDARS 7

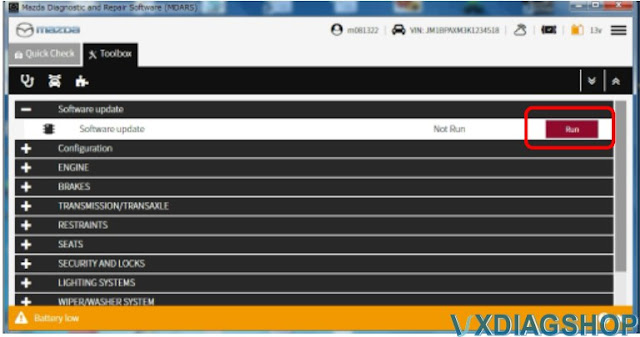
Select “Run”.

Reprogram 2019 Mazda 3 PCM with MDARS 8

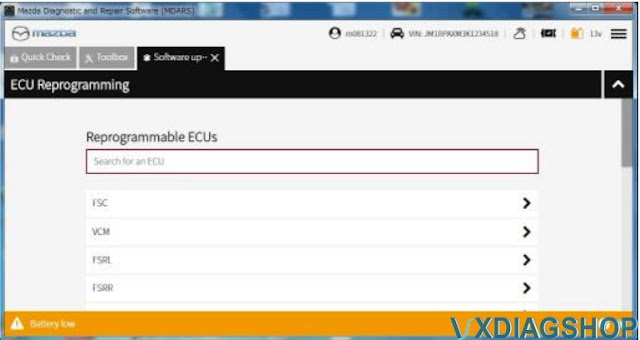
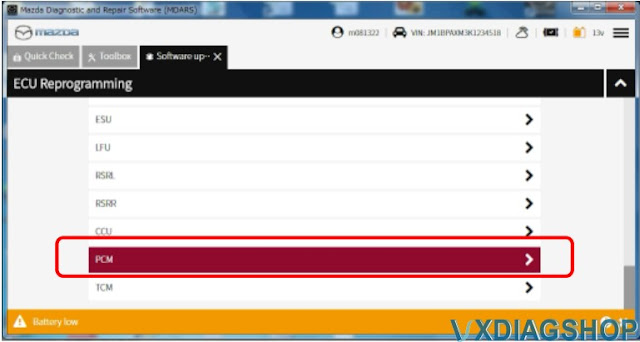
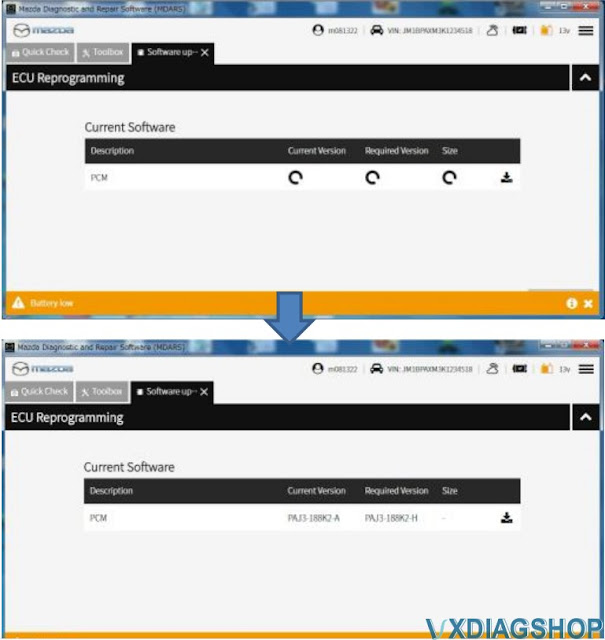
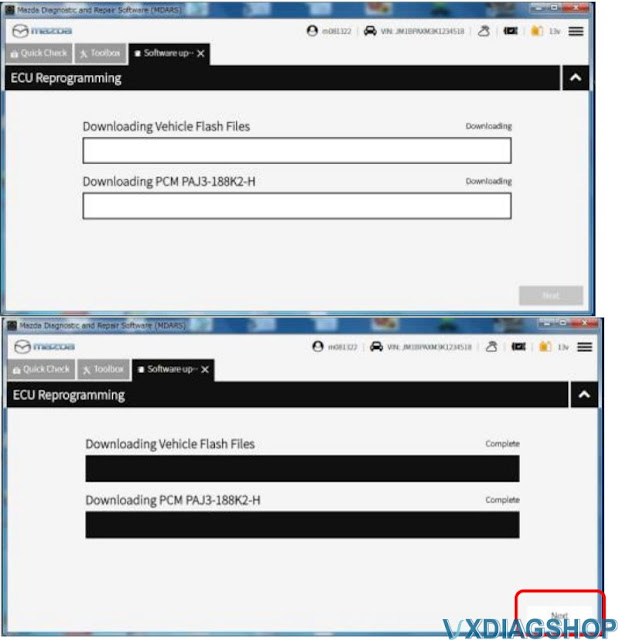
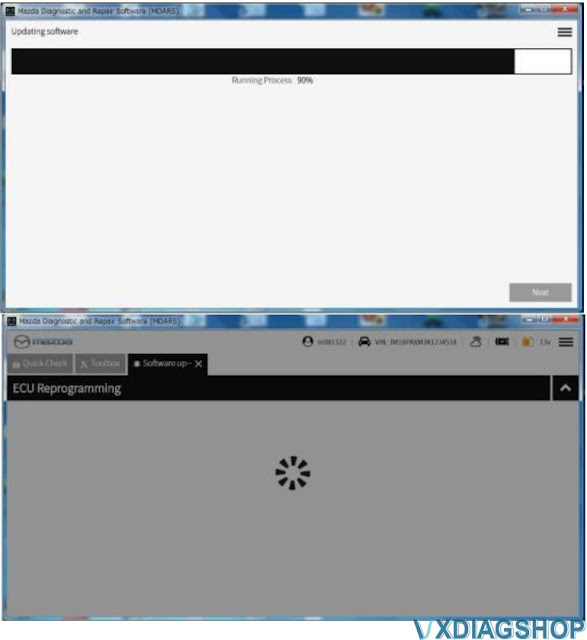
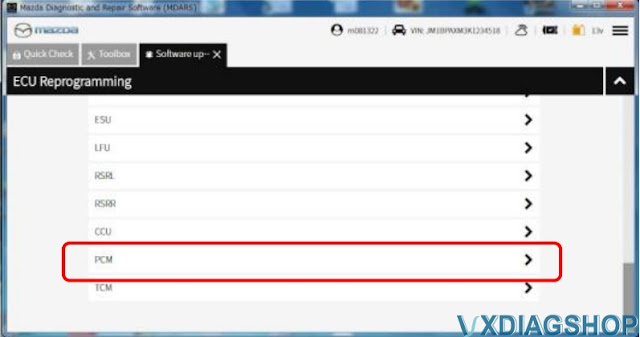
Scroll the screen, Select “PCM”. Wait and press Next

Reprogram 2019 Mazda 3 PCM with MDARS 9

Reprogram 2019 Mazda 3 PCM with MDARS 10

Reprogram 2019 Mazda 3 PCM with MDARS 11

Reprogram 2019 Mazda 3 PCM with MDARS 12

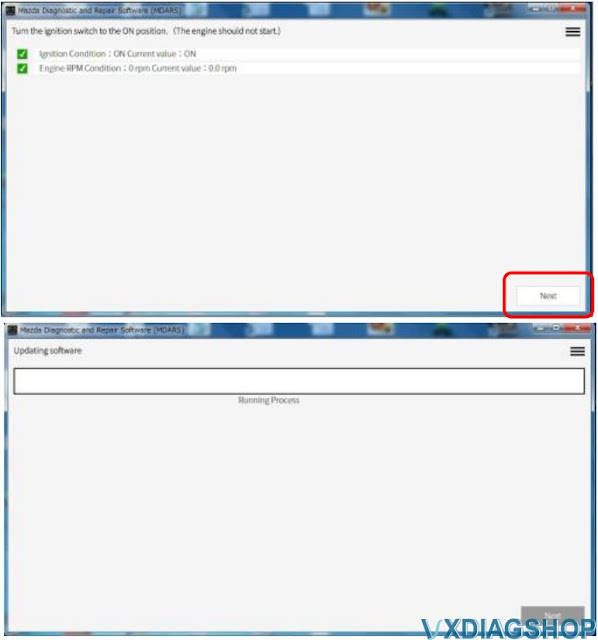
Read the screen instructions and select “Next”

Reprogram 2019 Mazda 3 PCM with MDARS 13

Reprogram 2019 Mazda 3 PCM with MDARS 14


Reprogram 2019 Mazda 3 PCM with MDARS 15

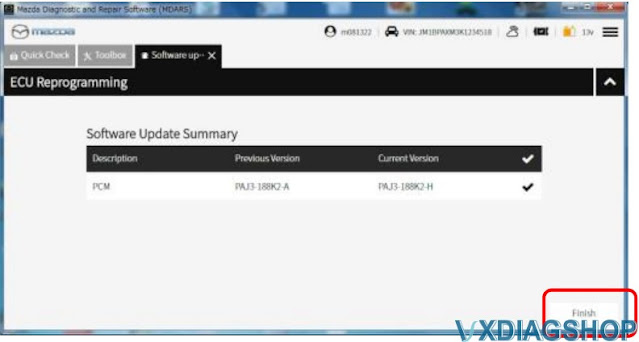
Capture the screen of filename and select “Finish”.

Reprogram 2019 Mazda 3 PCM with MDARS 16

Select “Run” “-PCM”

Reprogram 2019 Mazda 3 PCM with MDARS 17

Reprogram 2019 Mazda 3 PCM with MDARS 18

Confirm the filename after reprogramming and select “Finish”.

Reprogram 2019 Mazda 3 PCM with MDARS 19

Finish PCM reprogramming.

www.vxdiagshop.com

https://www.vxdiagshop.com/service/mazda-pcm-reprogramming-with-vxdiag-and-mdars.html