Showing posts with label VXDIAG GM Tech2WIN. Show all posts

2022/07/25

Buick Bucking Problem Solved by VXDIAG VCX NANO GM

It’s a 2003 Buick Century 3.1L bucking jumping when accelerating. No fault code.  This problem haunted me for half year. Not a single engine/tranny code in the entire process including history or pending code. After throwing tons of parts at it, I finally fixed it.

Tools:

  1. a PC-simulated GM Tech2 scanner (VXDiag VCX NANO GM from vxdiagshop.com) which has live data, misfire data, 2-way programming or sensor controls.
  2. Fuel pressure gauge.
Buick Bucking Problem Solved by VXDIAG VCX NANO GM

Observations:

  1. Car jump/buck/lunge forward while accelerating or climbing a hill. Worst at 2-3 gear.
  2. It appears to be engine problem, not transmission problem, because engine RPM drops from >2000rpm to <1000rpm like a “pause”. The engine quickly picks up RPM and the car lunge forward.
  3. Misfire data show occasional misfire in random cylinder, but not bad enough to set any code. During the “pause” there is no massive misfire.
  4. Fuel pressure gauge shows normal ~50psi idle or under load — normal fuel system
  5. MAP starts at 30kpa idle. Opened throttle to increase and maintain rpm to 2800, MAP increase to 45kpa and quickly restores to 28kpa — good vacuum, no CAT restriction
  6. STFT and LTFT are within 5%

Parts thrown at it (without improvement):

  1. Cleaned throttle, IAC, EGR. Not dirty at all. Tech2 tool is able to control the valve to expected position.
  2. Fuel: replaced pump, filter, fuel pressure regulator, all fuel injectors (expensive!)
  3. Ignition: replaced spark plugs, wire, coil, ICM
  4. Sensors: replaced TPS, IAC, MAF, MAP, 3x Crankshaft Position Sensor (facing firewall) Some articles call it 7x CPS but Tech2 tool shows 3x CPS.

The Culprit:

  1. The wiring harness that connects 3x CPS to the ICM

It is a 2-wire cable, purple and yellow, with male plugs on both ends. After 18 years and 250000 miles, this cable deteriorated due to proximity to exhaust manifold. Outer sleeve disintegrated. A plastic retainer which plugs to a hole near thermostat is broken. The cable is now dangling near crossover exhaust pipe, and partially melted. From google search I learned the 3x CPS is “critical” and will halt ignition without setting any code. (The other 24x CPS behind harmonic balancer is non-critical)

The Replacement part:

  1. GM 15301408 or Dorman 645-514

I bought the Dorman. Dorman lists it as a “Knock sensor harness” but it is actually 3x CPS. It’s a exact fit with the 2 plastic retainers (hoops) in the middle. I added a fiberglass sleeve around it for extra protection. The bucking problem is totally gone.

Many people had bucking problem without reaching a solution. I hope my story will help someone.

2021/03/02

VXDIAG Tech2Win Review on Chevrolet Cobalt 06

I finally got the VXDIAG VCX NANO GM module for just over 100$ with taxes and set up a laptop running 32 bit Windows 7.


What’s needed to get it up & running:

It came with the tool and a white disc with a bunch of files/folders on it. I prefer download updated versions of them elsewhere. vxdiagshop.com has them as well as the latest VxManager driver.

Requirements:

  • VXDIAG VCX Nano for GM GDS2/Tech2win (such as the one linked above)
  • Win7 32 bit non-VM Computer (Apparently these won’t work on VMs, although I have not tried that)
  • VMWarePlayer 6 (32bit), Tech2Win, GDS2, VXManager software’s latest versions all available here (go to GM section down the page)


Installation Steps: Do not plug in the device until told to do so

The order of installation is important.

1) Install VMWare-Player 6.0 (32bit version) but do not open it.
*Not 100% sure this is necessary, but various other installation write-ups say to use it.

2) Install Tech2Win

3) Install GSD2

4) Install VX Manager

Select Passthru & GM-GDS when promoted​

5) Plug In Device, let it load drivers (it may take a while) and make sure it loads in to USB Serial Port COM4 with Device Manager after the driver finding part is done.

6) Run VX Manager, update your devices firmware and licenses one after another.

7) Run Tech2Win and select “NORTH AMERICAN”

8) You should be prompted to select a device, select the top one (without a 2 in it)

9) If all went well, you should then be prompted to select another device, it should say your USB device. If this shows up, your MDI Candi module is all good.

When it’s well connected, Tech2win prompts you for a Product Line Code after selecting a few vehicle options.

VXDIAG Tech2Win Chevrolet Cobalt 06-01

VXDIAG Tech2Win Chevrolet Cobalt 06-02

VXDIAG Tech2Win Chevrolet Cobalt 06-03

Tech2win is what i need as the model is a 2006 Chevrolet Cobalt SS.

Every function on the tech2 is working great.
Its super easy to get lost in there. I played around with the AIM a bit by adding some icons to the display while triggering the signals through the BCM with the tech2. High beam, turn signals, anti theft indicator (added custom icon), coolant level, batt, park brake indicators work. I even got my cruise control resisters right, because its registering the proper modes thru the tech2 based on switch positions.

I went to do a VATS relearn (as the TDM is from an 06), and to my surprise it has already learned this new key and TDM and enabled the ECM.

I can turn on any circuit from the BCM with the click of a mouse, read inputs/outputs, reprogram my brake pedal sensor, VATS, ect.

VXDIAG Tech2Win Chevrolet Cobalt 06-04

VXDIAG Tech2Win Chevrolet Cobalt 06-05

VXDIAG Tech2Win Chevrolet Cobalt 06-06

VXDIAG Tech2Win Chevrolet Cobalt 06-07

Hope it helps.


Credit to Mr. Brian and Mr. Mayor.

https://www.vxdiagshop.com/service/vxdiag-tech2win-setup-and-review-on-cobalt-2006.html

2020/12/02

VXDIAG GM Tech2Win CD Win7 32bit Installation Review

Ever since VXDIAG VCX NANO for GM / OPEL came to the market, Vxdiag has received a myriad of user reviews. And some are selected in this post. Now, let’s read them one by one.


The moment when I received VXDIAG VCX NANO for GM / OPEL that was purchased from www.vxdiagshop.com, I was quite impressed by its good quality box, which included a long USB cable, VXDiag VCX NANO for GM as well as a Diver CD. Here is what I got:

vxdiag-vcx-nano-gm-win7-32bit


When I got it, it took me a couple of hours to figure out how to install the program correctly and learn the functions of the Tech2WIN program that comes with it. You have to follow the directions exactly on the VCXDIAG website on how to install the software and firmware. A tip is to use the CD of programs it comes with to install everything, rather than going to the website and getting the updated programs. I found that if you use the updated VX Manager program from the website, you will have a problem with TECH2WIN finding the VxDiag NANO module to use. I installed this on a Windows 7 32Bit laptop that I have for just vehicle programming and diagnostics for all my vehicles. I have read that it works with Windows 10 64Bit, but I cannot speak on this. Once I got it working I could use the TECH2WIN program to read all the modules on my truck, even the BCM that the dealer could not read. I realized the RCDLR was bad and bought a new one, but it needed to be reprogrammed to the BCM.


VXDIAG’s suggestion:

When it comes to Tech2WIN installation, you’d better use the CD of programs it comes with to install everything, instead of resorting to the website and obtaining the updated programs.


Hopefully, this post can help you.

2019/10/22

VXDIAG GM Tech2Win Missing Menu Solution

Problem:
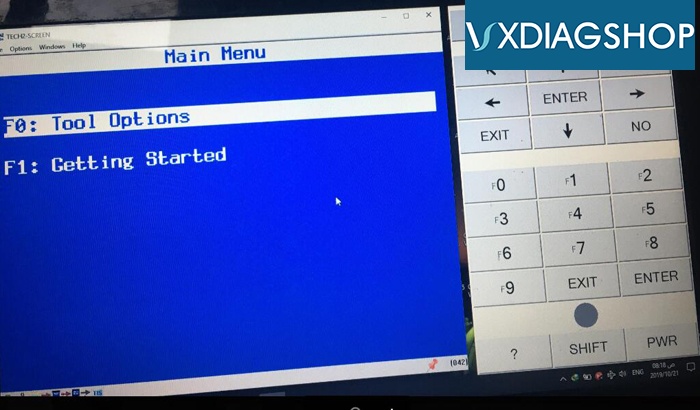
Hi, i find there are only 2 function options of  on vxdiag gm Tech2win software main menu.
My menu

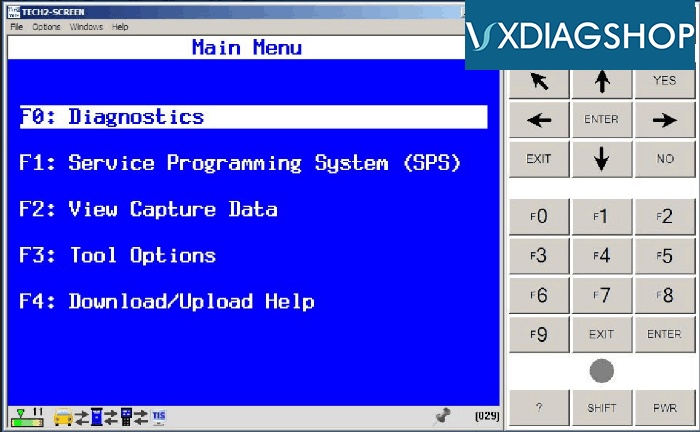
The correct menu show have more function options, like this
vxdiag-gds2-tool-option-1
How can i find the missing menu?


Solution:
We assume you set it up on Windows 10 operating system.
Windows XP and Windows 7 32bit system are recommended.
After connect car model you should choose correct software pack.


Feedback:
It works fine on Windows 7 system.

2018/12/13

How to install VXDIAG GM Tech2WIN on Windows 10 Step by Step

Tech2Win is the Diagnostic Software for 1991-2013 GM vehicles including passenger cars, light and medium duty trucks and saturn vehicles. It is the Windows PC version of the Tech2 handheld diagnostic tool.
Requirements:
IMPORTANT INFO:
  • Tech2Win will NOT work with a Windows Virtual Machine. It must be installed on a Windows PC
  • This setup guide is designed specifically for our diagnostic interface and software. It may not work with hardware/ software purchased from another vendor.
  • SPS [Service Programming System] requires an online subscription. Only offline diagnostics is supported.

Setup Tech2win on Windows 10 step-by-step:
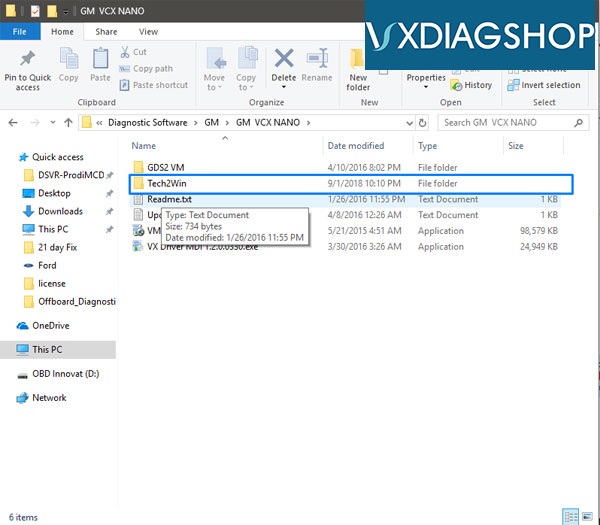
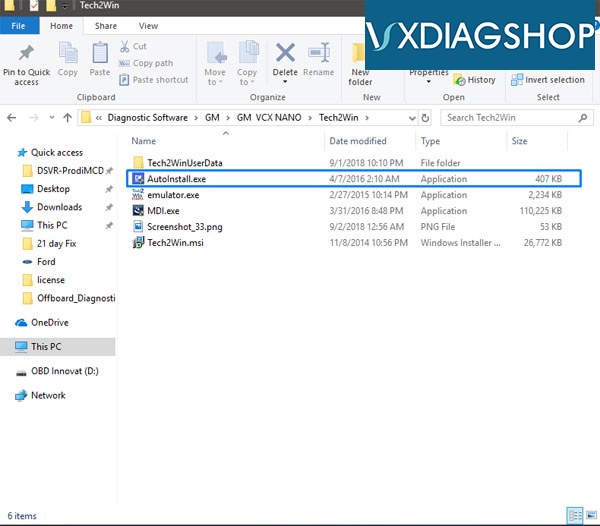
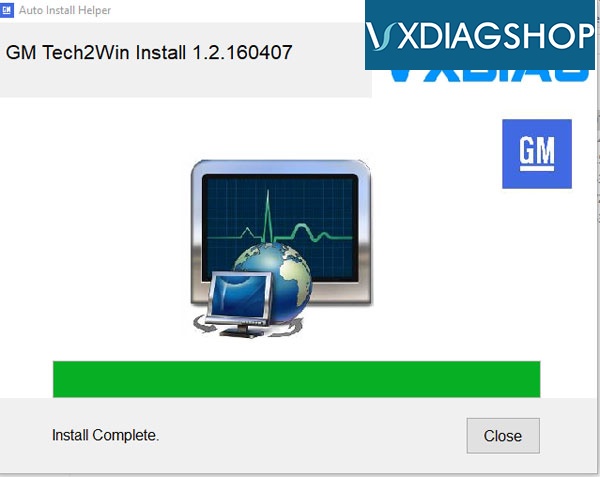
1. Insert Disc or open the downloaded software folder. Then open the [Tech2Win] folder and open the [AutoInstall.exe] to install the software.
setup-vxdiag-gm-tech2win-1
setup-vxdiag-gm-tech2win-2
setup-vxdiag-gm-tech2win-3
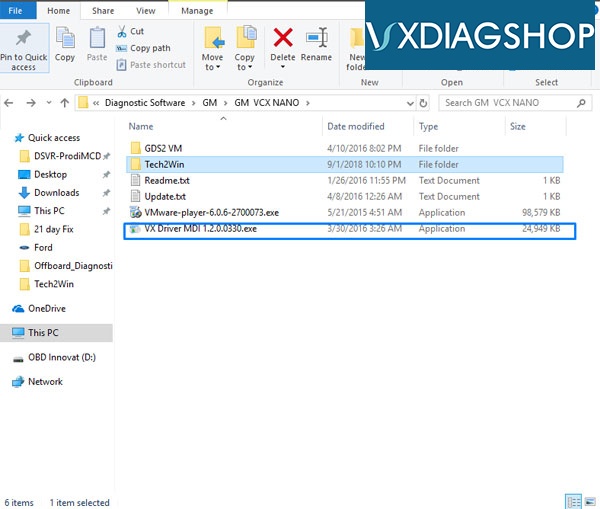
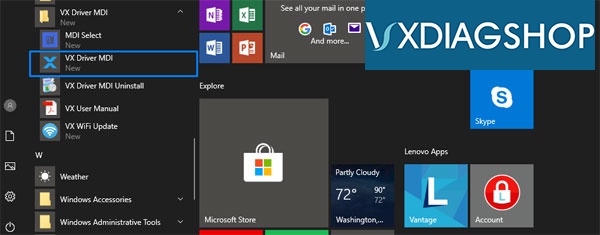
2. Install the [VX Driver MDI 1.2.0.0330.exe]. After the installation is complete, go to the Windows Start menu and find the [VX Driver MDI] folder and application and open it.
setup-vxdiag-gm-tech2win-4
setup-vxdiag-gm-tech2win-5
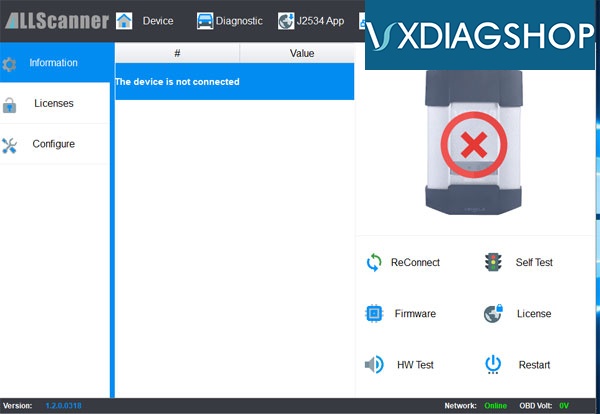
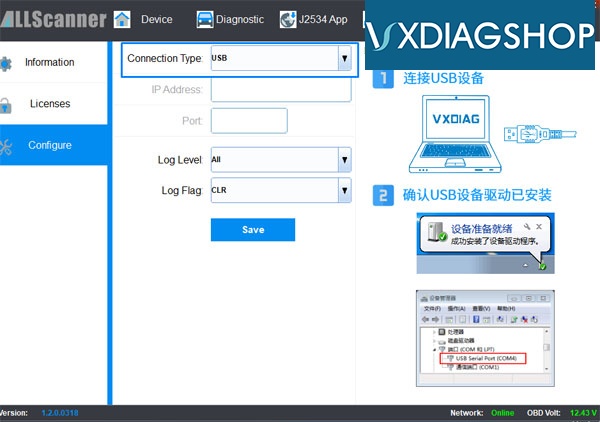
3. The VX Driver MDI software allows you to manage the interfaces currently connected to the PC. This is where you can verify if your hardware is connected, working properly, set which type of connection type you want [USB, WiFi, Bluetooth, etc] and more.
setup-vxdiag-gm-tech2win-6
setup-vxdiag-gm-tech2win-7
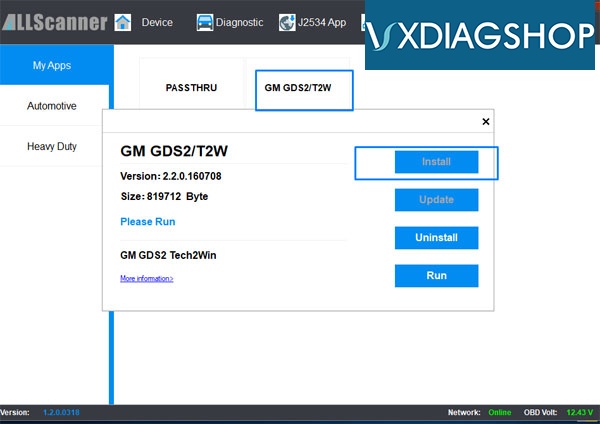
4. Go to the [Diagnostic] tab on the top and go to [My Apps] then [GM GDS2/T2W]. Then click on [Install].
setup-vxdiag-gm-tech2win-8
5. Go to the Desktop and start the Tech2Win software from the desktop shortcut icon.
setup-vxdiag-gm-tech2win-9
6. Right when the software starts,  the Tech2Win-Configurator will pop up and ask you to choose which configuration you’d like. This would be based on your region or type of vehicle you’re diagnosing. In our example, we choose [North America]. Based on your region, there will be different models available from the vehicle selection menu.
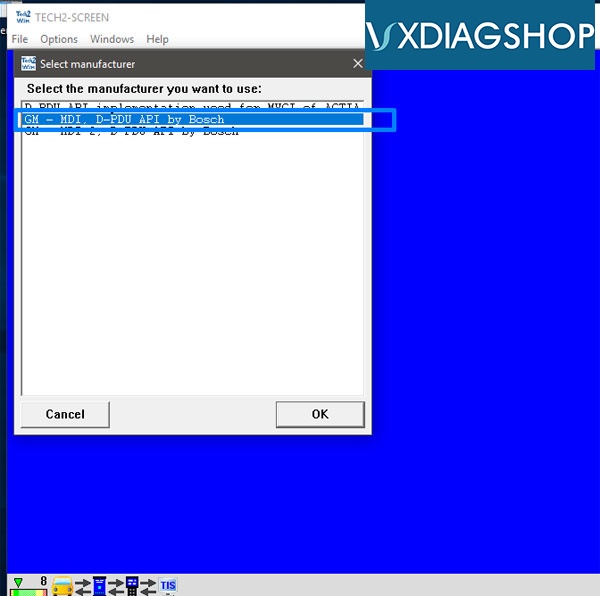
A box will pop up asking you to select the manufacturer or interface you’d like to use. The interfaces available will vary based on other types of diagnostic software you may have installed.
Select [GM - MDI, D-PDU API ny Bosch]
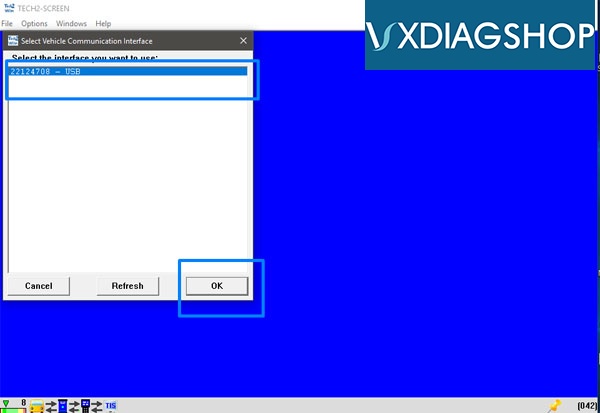
Then Select the interface [22124708 - USB] and click [OK]
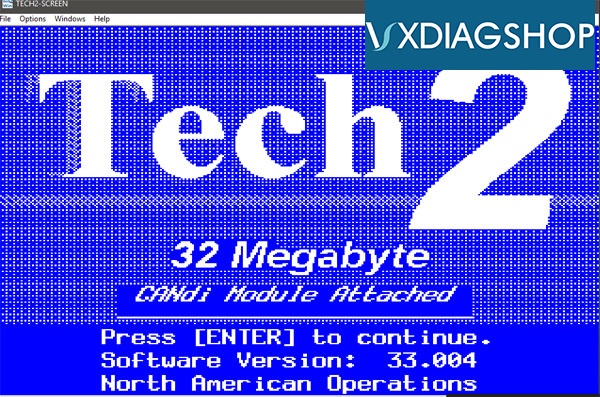
The software will start to load and then show you the main menu. Press [Enter] to continue.
setup-vxdiag-gm-tech2win-10
setup-vxdiag-gm-tech2win-11
7. Now the main VXDIAG GM Tech2Win menu will load. Press [Enter] to continue to main menu.
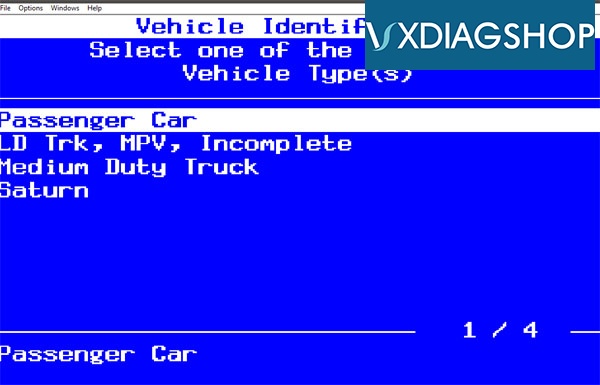
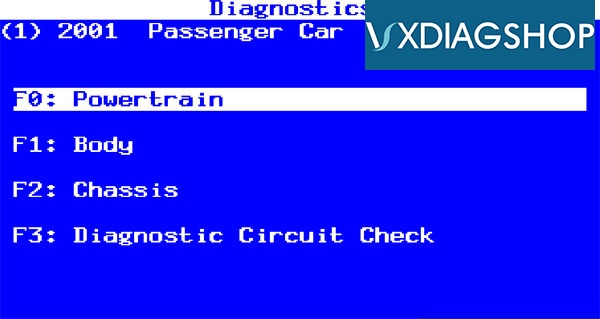
The next set of screenshots will show us going through the Diagnostic menu, selecting the
  • Model year
  • Vehicle Type
  • Powertrain, Body, Chassis
  • Engine Type
  • Transmission
  • Function you would like to perform
Some of the functions available include:
Diagnostic Trouble Codes [DTC]: Read and Clearing Diagnostic Trouble Codes
Data Display: Read real-time engine data, EVAP data, fuel trim data, misfire data, etc
Special Functions:
  • Engine Output Controls
  • Fuel System
  • IAC System
  • Crankshaft Position Variation Learn
  • Misfire Graphic
  • Service bay tests
setup-vxdiag-gm-tech2win-12
setup-vxdiag-gm-tech2win-13
setup-vxdiag-gm-tech2win-14
setup-vxdiag-gm-tech2win-15
setup-vxdiag-gm-tech2win-16
http://www.vxdiagshop.com/service/how-to-install-vxdiag-vcx-nano-gm-tech2win-on-windows-10-6027.html

Related post:
VXDIAG VCX NANO GM Tech2WIN Windows 10 Review