2023/10/31

VXDIAG VCX NANO GM V2023.10.19 Free Download

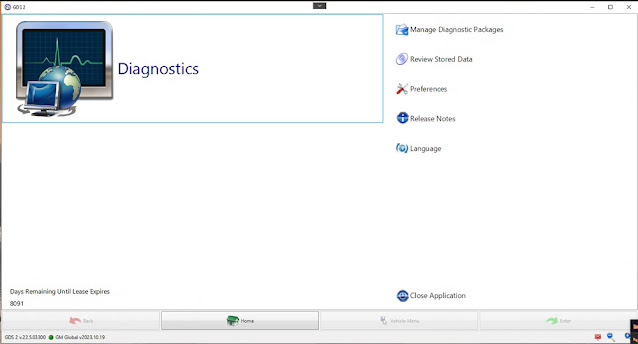
VXDIAG 2TB hard drive GDS2 software update to V2023.10.19 (Oct. 31st, 2023).


This update can be applied to vcx doip, vcx se and vcx nano gm scanners as well.


Software version:

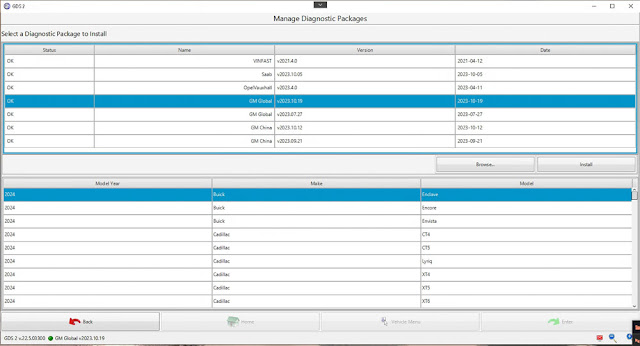
GM Global: V2023.10.19
GM China: V2023.10.12
Saab V2023.10.05
VINFAST v2021.4.0
Opel/Vauxhall V2023.4.0

Supports Buick Enclave, Encore, Envista, Cadillac CT4, CT5, Lyriq, XT4, XT5, XT6 etc till year 2024.

VXDIAG GDS2 Update to V2023.10.19 1

VXDIAG GDS2 Update to V2023.10.19 2

GDS2 2023.10.19 software can be downloaded free here

LINK

To use 2023.10.19 software, you need to install DPS software as well.

DPS 4.52 is included in the package.


For GDS2 patch, please contact www.vxdiagshop.com customer service for download link.

2023/10/30

How to Solve VXDIAG ODIS V23 Missing Car Models?

Problem:

I download odis 23.0.1 for vxdiag vcx se 6154 and install it without Problems.

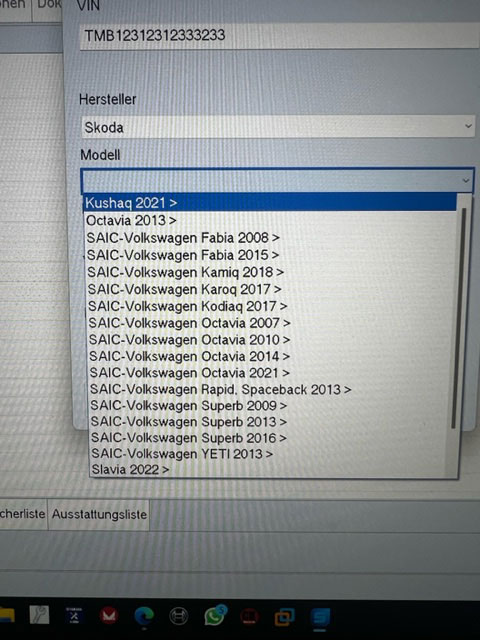
but for the Brand Skoda i missing some Cars.

How to solve the problem?

VXDIAG ODIS V23 Missing Car Models

Solution:

You used wrong license.txt file in your installation, you used for China market and not for Europe market.
So you must uninstall and to reinstall and this time use the correct license.txt file.

For example (DE) who is for Germany and is ok for any European country.


www.vxdiagshop.com

2023/10/29

How to Set up VXDIAG VCX DoIP with Renault CLIP?

Question: How to set up vxdiag vcx doip to work with CLIP Renault software?


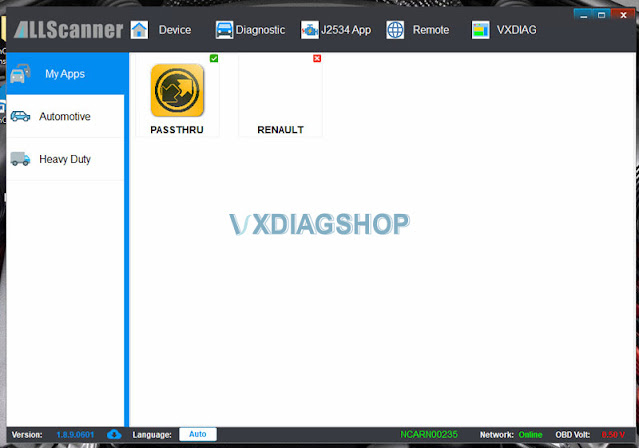
Step 1: Add Renault software license to your vcx doip or vcx se device.

https://www.vxdiagshop.com/wholesale/vxdiag-authorization-license-renault.html

Step 2: Download, install and activate Renault software

Free Download and Install VXDIAG VCX NANO Renault V219

Step 3: Install Renault driver in vx manager

Install Renault driver in vx manager

2023/10/26

VXDIAG GM 2017 Silverado SPS2 Programming Review

VXDIAG VCX NANO GM/Opel scanner review (October 25th, 2023)


You can get a Tech2 Diagnostic Interface for $800+ or this handy vxdiag vcx nano gm passthrough adapter, used with your laptop for just over $100.

It is not intuitive and I’d recommend checking somewhere else for instructions on how to use it. As far as the software on the included USB, only install what you need as some software is used for older GM, the other for newer.

If you’re worried about sketchy software, install it within a VM. Like others, I was successfully able to passthrough the USB device using VMWare and perform the work I needed done. You might need an ACDelco subscription ($45/VIN/2 years) to make the changes you want. This is a GM decision so save the one star reviews for them and their DRM.

Even with paying that, I avoided a tow to the dealership along with the one week wait for an appointment, restoring functionality after a faulty ‘protected codes’ in my Silverado.

2023/10/25

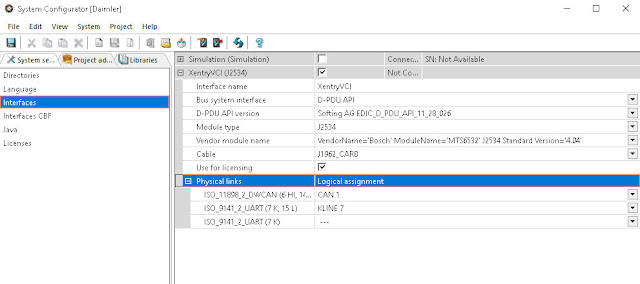
How to Set up Xentry VCI MTS6532 with DTS Monaco 8.16?

How to get Xentry VCI multiplexer (MTS6532) to work with DTS Monaco 8.16 CBF files?


Th user instruction here was tested ok on newest Xentry VCI, free to test on VXDIAG VCX SE/Benz C6. You are at your own risk.


Guide:
Editing slave.ini caused crash.

Problem was because never Xentry installations does not have 32bit PDU folder anymore (There is only PDU64 folder, no PDU).

So copy C:\Program Files (x86)\Mercedes-Benz\Xentry\bin\PDU\ -folder from Xentry 9/2021 to Xentry/bin and made this setting to DTS Monaco slave.ini:

[MVCI_Device]
RootPath=”C:\Program Files (x86)\Mercedes-Benz\Xentry\bin\PDU\pdu_api_root_bosch.xml”
DeviceOptions=””

After this, DTS monaco find MTS6532 in interface CBF and it’s working.

This can solve problems with clone C6 (MTS6532) multiplexer too.

For SMR interface you can get it to working with J2634 protocol.

Change System settings / Directories “D-PDU API root description file” to C:\Program Files (x86)\Mercedes-Benz\Xentry\bin\PDU\pdu_api_root_passthru.xml, and make settings as in attached picture. MTS6532 API does not seem to work anymore.

Set up Xentry VCI MTS6532 with DTS Monaco 8.16


2023/10/24

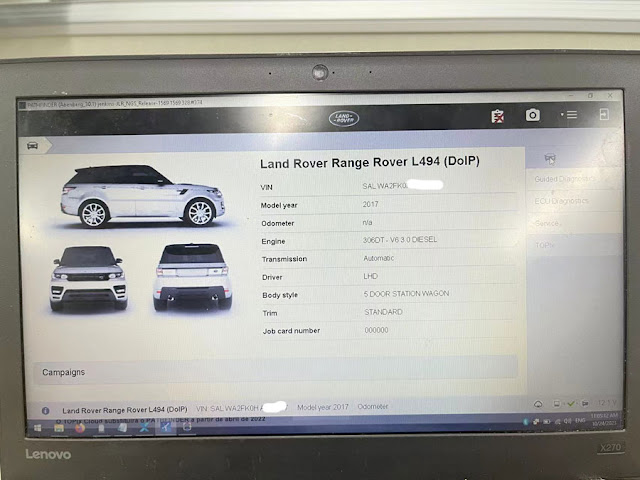
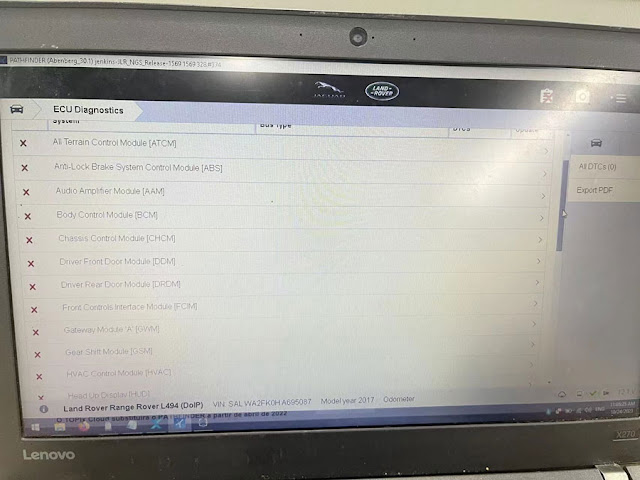
VXDIAG VCX SE Cannot Read JLR DoIP Module Solution

Problem:

The vxdiag vcx se JLR DoIP device only reads VIN and vehicle information of the Range rover L494 MY2017, it cannot access/scan any modules. Any suggestion?

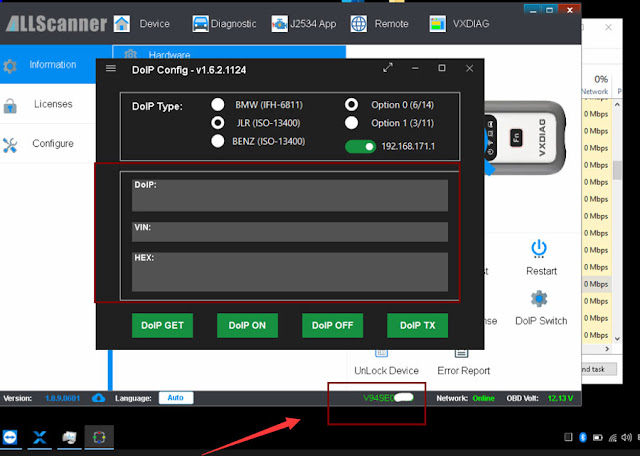
VXDIAG VCX SE Cannot Read JLR DoIP Module 1

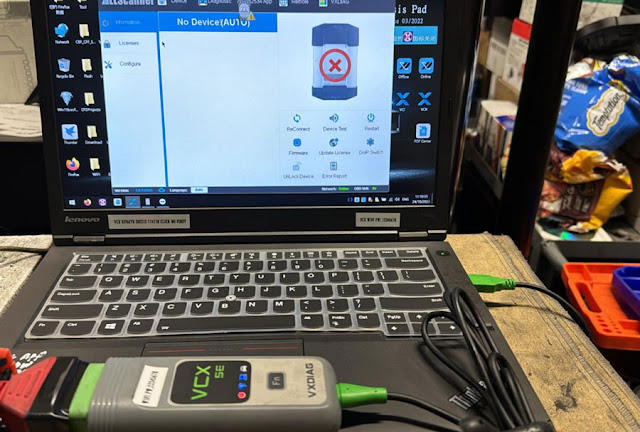
VXDIAG VCX SE Cannot Read JLR DoIP Module 2

Solution:

Turn on JLR DoIP switch.

If vx manager detects the device but DoIP config shows nothing, restart computer, disconnect vcx se for a few minutes, then plug the device, turn on DoIP switch and try again.

If DoIP switch still not working, there is a problem with the DoIP module. Contact your dealer to see if your vcx se need repair.

VXDIAG VCX SE Cannot Read JLR DoIP Module 3

2023/10/23

VXDIAG VCX SE OBD Indicator Not Turn on Solution

Problem:

My vxdiag vcx se Benz device was not detected by vx manager (no device error). The vx manager version is up-to-date.

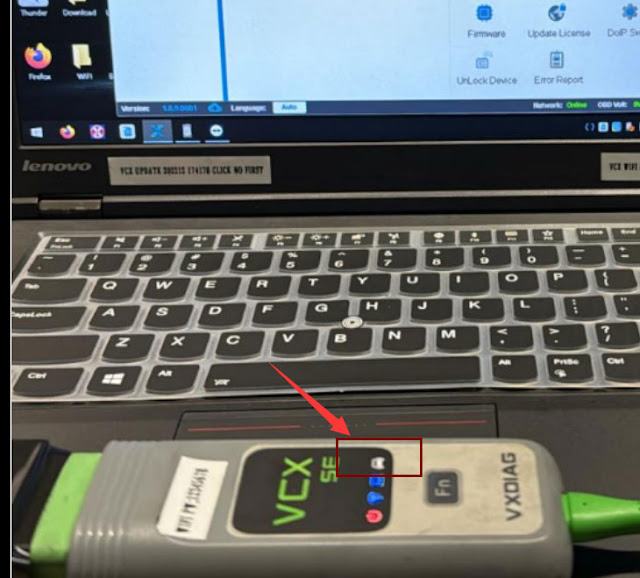
OBD indicator on the vcx se unit did not turn on. Any advice?

VXDIAG VCX SE OBD Indicator Not Turn on 1

VXDIAG VCX SE OBD Indicator Not Turn on 2

Solution:

OBD indicator does not turn on which means there is no communication between device and OBD.

Unplug vcx se, connect it with OBD and PC again. It will work.

If OBD indicator still not turning on, this is a faulty device.

Better have your dealer check your device and decide if it requires repair.

www.vxdiagshop.com
2023/10/18

How to Solve VXDIAG Renault Register Problem?

Problem:

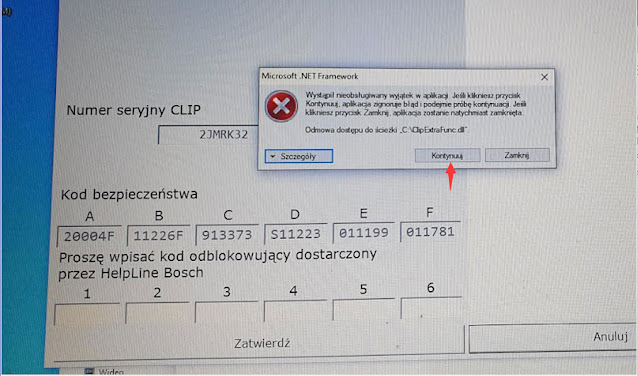
I have a problem registering vxdiag vcx nano Renault software.

Notice as attached:

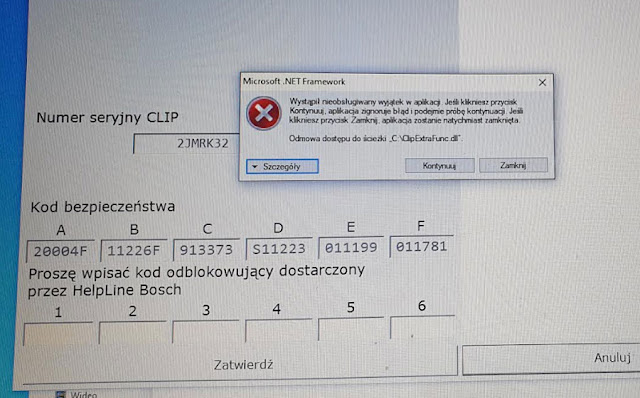
“An unhandled exception occurred in the application.

Error Access denied to path .COOp Extra Func .dl”

Solve VXDIAG Renault Register Problem 1

Solution;

Just press “Continue” and ignore the error message.

Solve VXDIAG Renault Register Problem 2

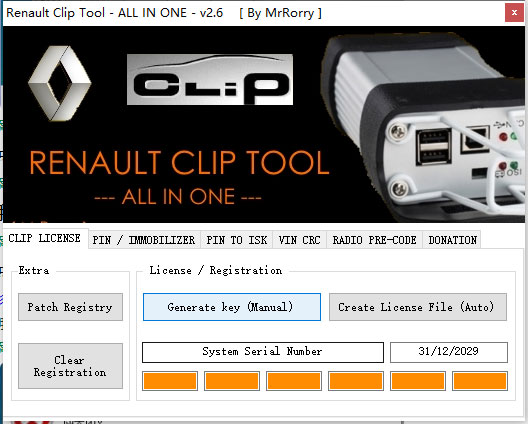
You will be able to generate activation key by keygen.

Solve VXDIAG Renault Register Problem 3


2023/10/17

Program Colorado 2017 ECM & IMMO by VXDIAG SPS2

 Vehicle Model: Chevrolet COLORADO 2018

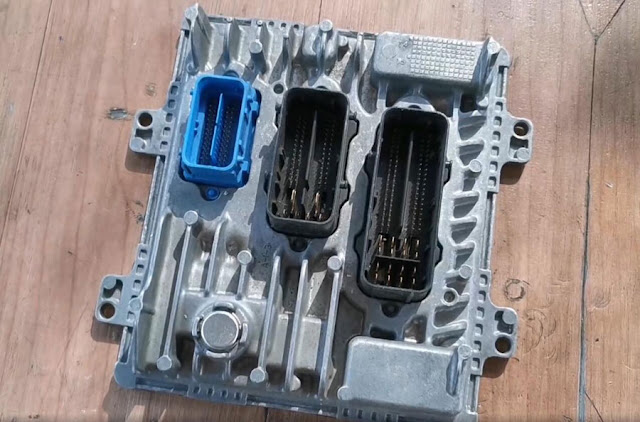
ECU type: ACDelco E98

Purpose: programming ECM and Immobilizer system after replacing ECU e98 Delco


Steps:

Replace ECU e98 Delco
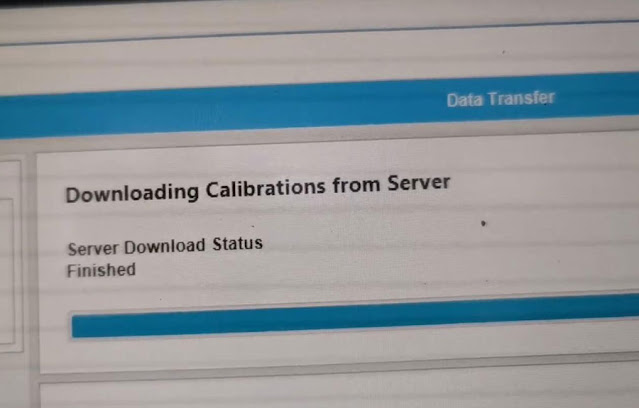
Programming ECM CALIBRATION FILE
Programming IMMOBILISER System
Job well done.
Powered by (GM TECHLINE CONNECT SPS2) and J2534 Passthru (here VXDIAG VCX SE was used)

Program Colorado 2017 ECM & IMMO by VXDIAG SPS2 1

Program Colorado 2017 ECM & IMMO by VXDIAG SPS2 2

Program Colorado 2017 ECM & IMMO by VXDIAG SPS2 3

Program Colorado 2017 ECM & IMMO by VXDIAG SPS2 4

Program Colorado 2017 ECM & IMMO by VXDIAG SPS2 5

Program Colorado 2017 ECM & IMMO by VXDIAG SPS2 6

Program Colorado 2017 ECM & IMMO by VXDIAG SPS2 7

Program Colorado 2017 ECM & IMMO by VXDIAG SPS2 8

Program Colorado 2017 ECM & IMMO by VXDIAG SPS2 9

Program Colorado 2017 ECM & IMMO by VXDIAG SPS2 10


2023/10/16

How to Install ODIS-E V17 for VXDIAG VCX SE 6154?

Latest ODIS offboard diagnostic engineering software V17.01 was tested working with VXDIAG 6154 scanners.


ODIS E V17.01 can be downloaded free here.

Keygen is not included. If need activation, buy the activation service here. It contains both ODIS-S V23 and ODIS-E V17. Both can be activated free for once.

https://www.vxdiagshop.com/wholesale/vw-audi-software-v23.html


Version: ODIS Engineering 17.01

Compatible device: VXDIAG VCX SE 6154VXDIAG VCX NANO 6154 as well as other passthru devices (openport 2, vnci 6154a, godiag j2534 etc)

Operating system: Win10 or later O/S, RAM>4G. Win7 is not supported since this version.

Language: Multi-language


How to Install ODIS S V17 for VXDIAG 6154?


Video reference

Step 1: Install ODIS-E V17 Setup
Open ODIS-E 17.0.1 folder
Open ODIS-Engineering_17_0_1 folder
Run OffboardDiagSetup-Engineering-17_0_1
Select Setup language

Install ODIS-E V17 for VXDIAG VCX SE 6154 1

Press Next
Select diagnostic interface as VAS 6154 and press Next

Install ODIS-E V17 for VXDIAG VCX SE 6154 2

Then software will ask license for activation
Open license.dat from ODIS-E 17.0.1/Patch & License folder

Install ODIS-E V17 for VXDIAG VCX SE 6154 3

Install ODIS-E V17 for VXDIAG VCX SE 6154 4

Select Create a folder in the start menu and create shortcuts for all users
Installing Setup until finished

Install ODIS-E V17 for VXDIAG VCX SE 6154 5

Step 2: Activate ODIS-E
Run Patch & License folder, open 17.0.1 patch folder
Copy all three files from 17.0.1 patch folder and paste to Win11ProW X64/Program Files/OE folder

Install ODIS-E V17 for VXDIAG VCX SE 6154 6

Install ODIS-E V17 for VXDIAG VCX SE 6154 7

Send OffboardDiagLauncher_protected from Win11ProW X64/Program Files/OE to desktop

Install ODIS-E V17 for VXDIAG VCX SE 6154 8

Rename OffboardDiagLauncher_protected desktop shortcut as ODIS E 17.01 and run it

Install ODIS-E V17 for VXDIAG VCX SE 6154 9

ODIS-E will ask for an activation key
Send the hardware ID to vxdiagshop.com engineer and we will send you back the activation key
Input activation key and press Register

Install ODIS-E V17 for VXDIAG VCX SE 6154 10

Step 3: Install PostSetup
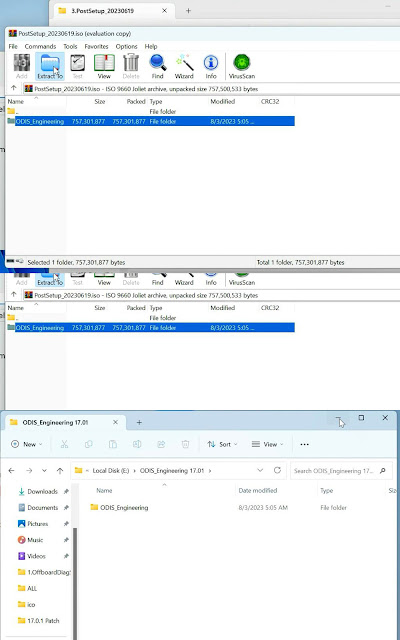
Open PostSetup_202300619.iso on ODIS-E 17.0.1 folder as Winrar file
Extract PostSetup 202300619 file to Disk E

Install ODIS-E V17 for VXDIAG VCX SE 6154 11

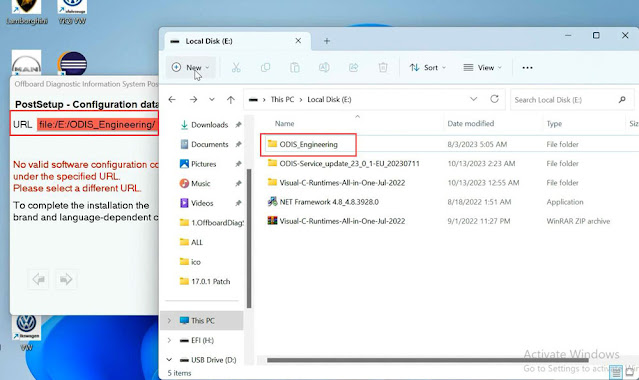
In ODIS-E 17.01 if we select file location to E:/ODIS_Engineering, it says no valid software configuration.

Install ODIS-E V17 for VXDIAG VCX SE 6154 12

We do this.
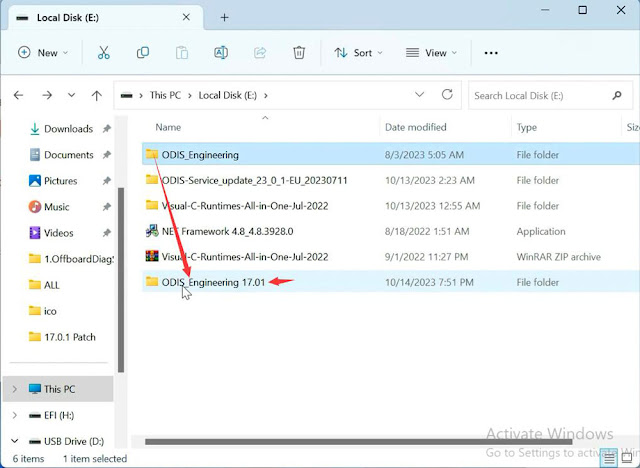
Create a new ODIS Engineer 17.01 folder on disk E, copy ODIS Engineering folder to this new folder.

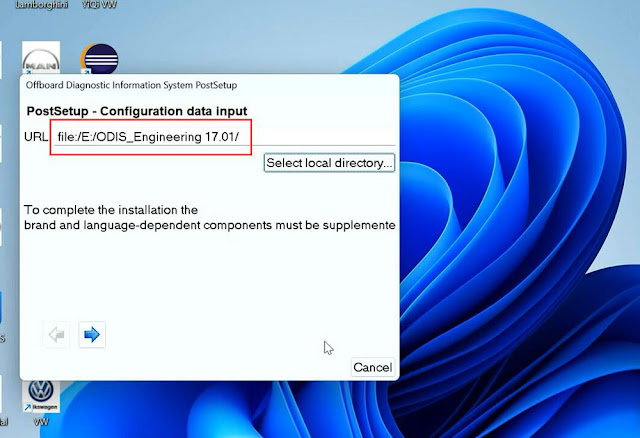
Select local directory as file:E:/ODIS_Engineering 17.01/, it should be fine.

Install ODIS-E V17 for VXDIAG VCX SE 6154 13

Install ODIS-E V17 for VXDIAG VCX SE 6154 14

Select PostSetup language
Wait until postsetup installation finished

Install ODIS-E V17 for VXDIAG VCX SE 6154 15

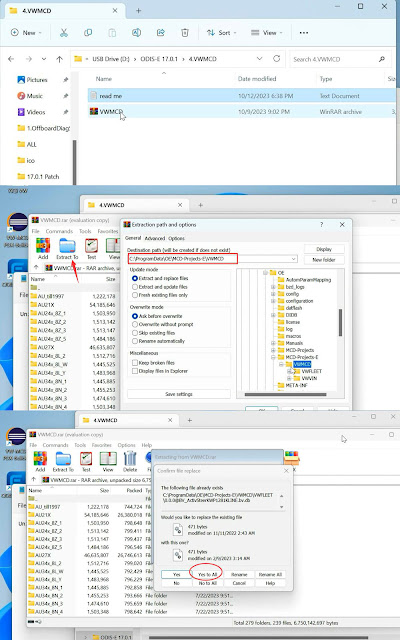
Step 4: Exyatct VWMCD

Unzip VWMCD file in 4.VWMCD folder
and extract to C:/ProgramData/OE/MCD-projects-E/VWMCD folder

Install ODIS-E V17 for VXDIAG VCX SE 6154 16

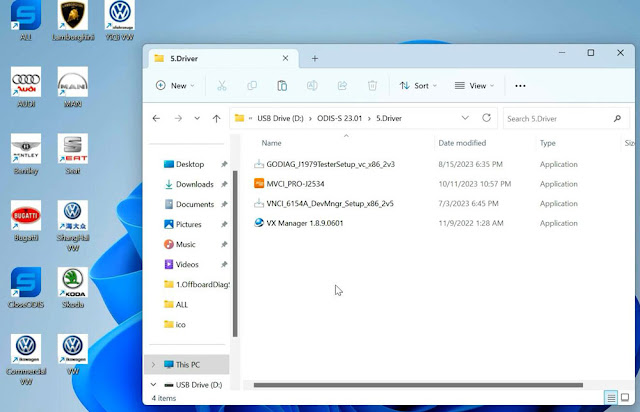
Step 5: Install Driver.

The U disk contains both ODIS-S and ODIS-E software. Drivers are in the ODIS-S 23.0.1 folder.

Install ODIS-E V17 for VXDIAG VCX SE 6154 17

Install the corresponding driver like Step5 here.


If already installed driver for ODIS-S, don’t need to install same driver for ODIS-E again.


Step 6: Run ODIS-E 17

Run ODIS-E 17.01 on desktop
Software is ready to use.

Install ODIS-E V17 for VXDIAG VCX SE 6154 18


www.vxdiagshop.com