2024/01/31

Donot Choose Japan when Install VXDIAG Nissan Software

Caution:

When installing Nissan Consult III plus v226 software for VXDIAG VCX NANO or VCX SE Nissan scanner, don’t select Japan country/region during the first installation, otherwise, software will stuck when scanning all systems.

Donot Choose Japan when Install VXDIAG Nissan Software

Select regions such as North America, Europe, Far East, Middle and Near East, Latin America, Oceania or Africa.


Check How to install vxdiag nissan software and driver

https://www.vxdiagshop.com/service/how-to-install-vxdiag-nissan-software-driver.html

2024/01/29

VXDIAG ODIS 9.1.0 'General Database Access' Solution

Problem:

I got an error when installing ODIS service 9.1.0 for vxdiag vcx se 6154 interface.

Error ODS6501E, general database access, the database didb-GFS-s required for the application was not found.

Any solution?

VXDIAG ODIS 9.1.0 'General Database Access

Solution:

Your software is incomplete or corrupt.

Download ODIS 9.1.0 again.

ODIS 9.1.0 Download Link

(Run setup as administrator).

Or get a ODIS V23+ ODIS-E V17 U disk with activation.

2024/01/28

VXDIAG ODIS Error in A Software Component Detected Solution

Problem:

I was trying to install odis-s v23 for vxdiag vcx se 6154 interface. It fails me. It’s Windows 10 system.

Error ‘An error in a software component has been detected’.

Any idea?

VXDIAG ODIS Error in A Software Component Detected 1

VXDIAG ODIS Error in A Software Component Detected  2

VXDIAG ODIS Error in A Software Component Detected  3


Solution:

Install ODIS software separately on a clean Win10 system.
Don’t install ODIS with other programs, Renault etc.

VXDIAG ODIS Error in A Software Component Detected  4

Don’t install ODIS on a Home edition system. It will not work.

If still not working, uninstall the vehicle connection (VW MCD, PDU).
Contact www.vxdiagshop.com customer service if all no luck.

Or get an ODIS U disk instead of downloading software on mega.


2024/01/26

VXDIAG VCX SE Cannot Read VIN for 1999 BMW?

Problem:

I got the vxdiag vcx se bmw scanner working with the ISTA+ 4.35.20. It failed to read VIN, and manual input also failed. No communication with a 1999 BMW model.

VXDIAG VCX SE Cannot Read VIN for 1999 BMW 1

VXDIAG VCX SE Cannot Read VIN for 1999 BMW 2

Here is the clue.

VXDIAG VCX BMW cannot do vehicles that old especially K-line models.

It works better on 2005 onwards BMW. Same as other brands.

www.vxdiagshop.com

2024/01/24

How to Disable Porsche TPMS by VXDIAG PIWIS III?

Tutorial: How to disable TPMS for Porsche using PIWIS III diagnostic software.

vxdiag porsche piwis iii

When you have the tires replaced, first you must actually disconnect the TPMS control unit so that the CAN Controller does not continue to recognize it.


The control unit is located in the front trunk next to brake fluid reservoir.

1. Remove and unplug the dome light on the cowling plastic. Remove all of the screws that hold this entire plastic panel in. There are a good number on top by the seal and one on each side by the bottom.

2: Now unplug the control unit it is part number 997 618 103 06, Do not remove it. This way you can always just plug it back it and use it again.

3. Reassemble the front trunk again.

4. Hook up the PIWIS tester to the car via the OBD2 port and do a complete check of all the control units.

5. Select “Gateway” and then “Coding” then “”Required Control Units List”. This will list all installed CAN units.

6. Now select “Tire Pressure Monitoring System” and change to ” Not Installed” and code it, then exit to the main screen again.

The next steps will code your instrument cluster and to do so will require that you have your engine number, so have it handy, you will find out why.

7. Select “Instrument Cluster” and then “Coding” then “Vehicle Variants”.

8. Now select your “Model Year” then “Model”, “Roof Version”, “Country” (02 is for USA, Puerto Rico). The next item will be “Versions” (553 is USA/Canada).

9. Select your “Individual and exclusive equipment” by highlighting each item that would apply such as: 454-Cruise, 023-Silver Colored Gauge faces etc. DO NOT select 423/483 TPM!!!! This is the TPMS for the cluster and must not be highlighted.

10. Move to the next screen and finish the “Audio and Communication ” by highlighting what applies to your car.

11. Next will be the “Wheel Size” and finally it will ask about your engine number.

12. Proceed forward and then Code with F8.

That’s it and now TPMS is removed.


www.vxdiagshop.com

Can I Transfer VXDIAG VCX SE License to VCX FD?

Question:

Can I transfer all my licenses from VXDIAG VCX SE to this new VCX FD VCI and can I buy this VCI without any licenses?

Transfer VXDIAG VCX SE License to VCX FD

You are allowed to transfer license from vcx se to vcx FD vci. But have to wait 6 months.

Currently, only Ford/Mazda and GM software are integrated into the VCX FD.

VXDIAG engineers are working on it.
When they integrate all software licenses to the VCX FD interface, you can transfer license by providing serial number of both VCX SE and VCX FD.


www.vxdiagshop.com

2024/01/22

VXDIAG SSM4 Program 2017 Subaru BRZ Key Fob

VXDIAG Subaru SSM4 review: programming/copying Subaru BRZ key for cheap.

VXDIAG SSM4 Program 2017 Subaru BRZ Key Fob

User report:

‘I just want to let you guys know that you can pretty much program a new key fob for the win.
In my experience, I was able to program a new Key fob for my 2017 BRZ using SSM4 and getting a CLEAN [virgin] key fob from eBay.
Again, it has to be a key fob that is ready to be programmed. Any used key fob already programmed with an existing vehicle WILL not work until it’s dis-virgin as long as the key fob FCC ID matches your existing one.
In my case the FCC for my key fob is HYQ14AHC. you can find that at the back of the key fob.
So any Subaru key fob works as long as it matches the FC ID – it’s interchangeable between Subaru vehicles.
All you need is a copy of :
1. SSM4 (depending on the copy you get you might need additional software to be able to use it )
2. VXDIAG VCX SE Subaru scanner (or of the J2534 certified dongle)
3. and of course a virgin keyless entry FOB matching your existing FCC ID fob’

2024/01/21

Program GM E37 ECM with VXDIAG VCX NANO GM & SPS2

This is a 2008 Chevy Malibu with ACDelco E38 ECM. There was no communication with the PCM.

Program GM E37 ECM with VXDIAG VCX NANO GM & SPS2 1

We are going to replace the ECM.
Plug in your donor ECM and reprogram it using VXDIAG VCX NANO GM and GM SPS2.

Program GM E37 ECM with VXDIAG VCX NANO GM & SPS2 2

Update vcx nano firmware and license to latest version before connecting the device with vehicle.

Program GM E37 ECM with VXDIAG VCX NANO GM & SPS2 3

You do have to have the vx manger closed because the manager will kind of take control of your VCI and then another program will not be able to run.
You can’t have two different things accessing your VCI at the same time.

Turn on ignition switch.
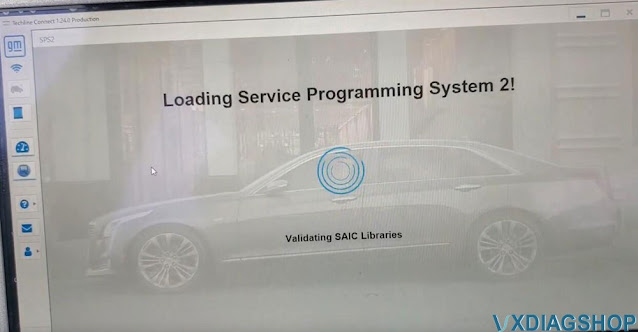
Go ahead and connect up to the laptop and open SPS2.
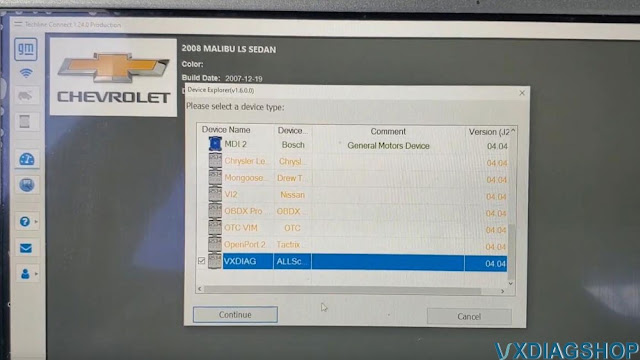
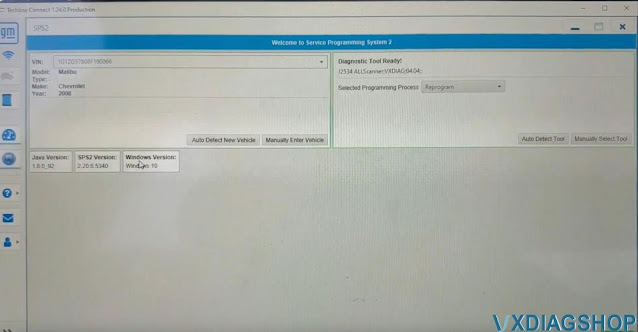
We got Techline Connect login, go ahead and enter the VIN number manually so we’re going to be reprogramming this.

Program GM E37 ECM with VXDIAG VCX NANO GM & SPS2 4

It went ahead and filled in the model and the year, just hit select and it asks the VCI. We are going to select our VCI which in this case is the VXDIAG.

Program GM E37 ECM with VXDIAG VCX NANO GM & SPS2 5

I can see it is actually trying to communicate down there that flashing.

Program GM E37 ECM with VXDIAG VCX NANO GM & SPS2 6

It gives us a conflict VIN because we’ve got a used module inserted and connected to the vehicle.

We press SPS.

This is a non-global vehicle so you should be able to program a used module without any problem.

Select Reprogram.

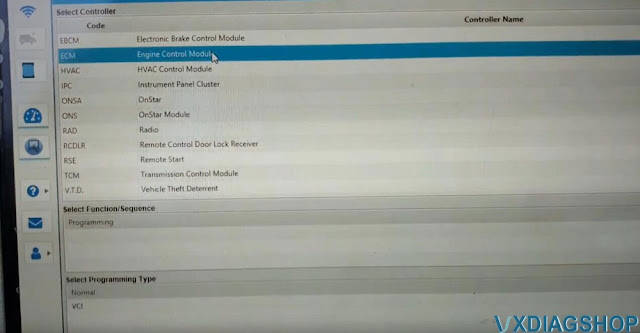
Select ECM-Engine Control Module

Program GM E37 ECM with VXDIAG VCX NANO GM & SPS2 7

Program GM E37 ECM with VXDIAG VCX NANO GM & SPS2 8

We’re going to tell it to override because it’s detecting this was the VIN number that’s inside the PCM.

So we’re going to tell it to override and use the VIN number that we actually entered which is the correct VIN number of this vehicle.

Program GM E37 ECM with VXDIAG VCX NANO GM & SPS2 9

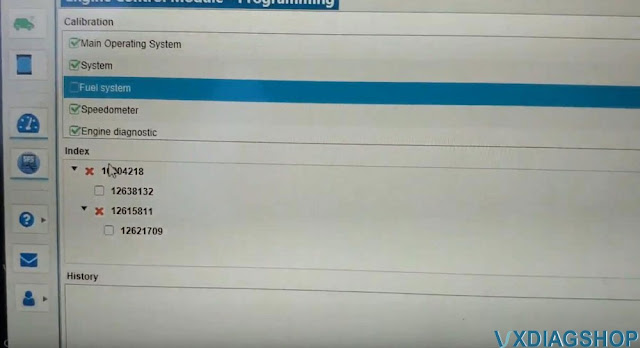
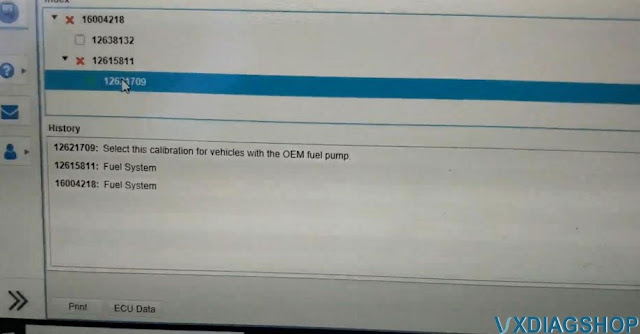
We need to select the fuel system tab.  You need to actually manually select if it is not lit up.

There was a fuel pump upgrade for some vehicle that looks like that were used as taxis in the Las Vegas area that had a different modified fuel pump.

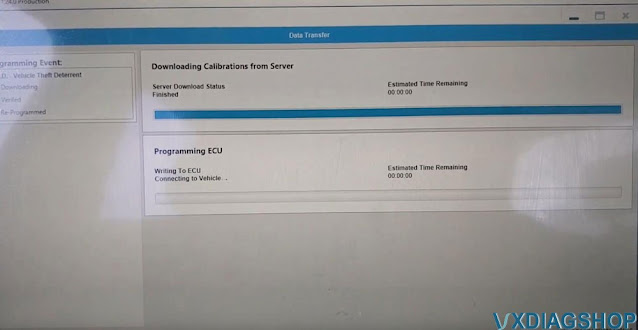
This vehicle is going to most likely be the OEM so we’re going to leave that as the OEM and hit next and then we’re going to tell the start programming.

Program GM E37 ECM with VXDIAG VCX NANO GM & SPS2 10

Program GM E37 ECM with VXDIAG VCX NANO GM & SPS2 11

Program GM E37 ECM with VXDIAG VCX NANO GM & SPS2 12

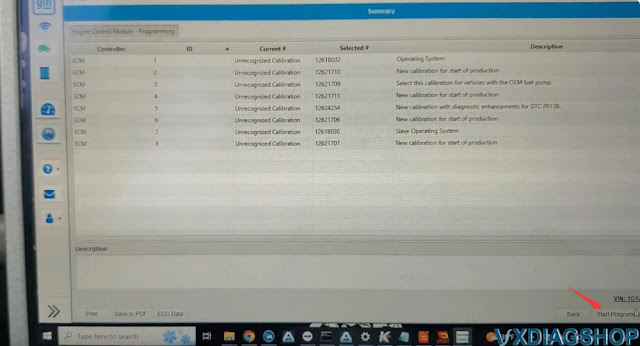
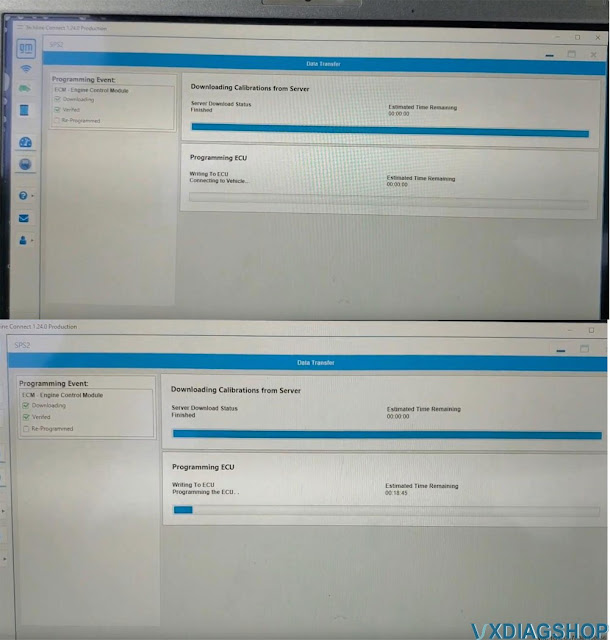
It’s going to download the files from the server and then it’s going to start actually write to the vehicle.

The programming process takes about 18 minutes to finish.

Wait until programming is completed.

Program GM E37 ECM with VXDIAG VCX NANO GM & SPS2 13

It was completed.

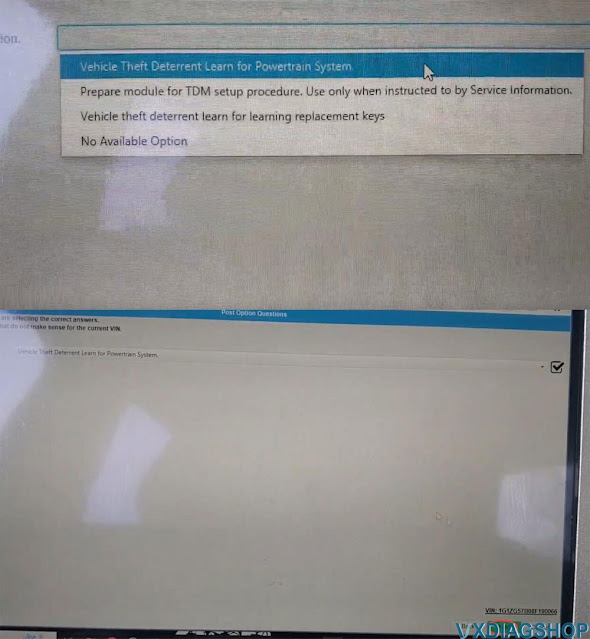
We’ve got to select Vehicle Theft Deterent and select Learn.

Program GM E37 ECM with VXDIAG VCX NANO GM & SPS2 14

The procedure is for theft deterrent learn powertrain system so that means we replace the engine computer.

It makes you like a 10 to 12 minutes wait depends on the model.
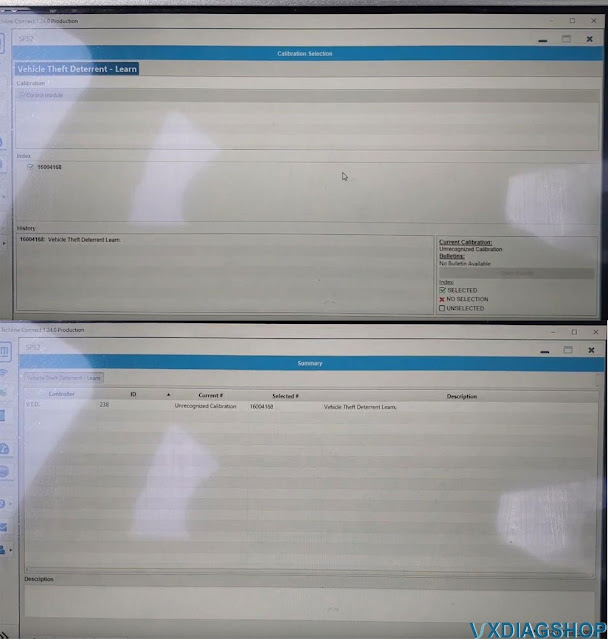
Program GM E37 ECM with VXDIAG VCX NANO GM & SPS2 15

Program GM E37 ECM with VXDIAG VCX NANO GM & SPS2 16

Start programming.

Wait until it is finished.

Program GM E37 ECM with VXDIAG VCX NANO GM & SPS2 17

Theft DET turn learning was done.

Now key on cranks and starts. But we got the air cleaner and all that kind of stuff disconnected up there but that was a success.
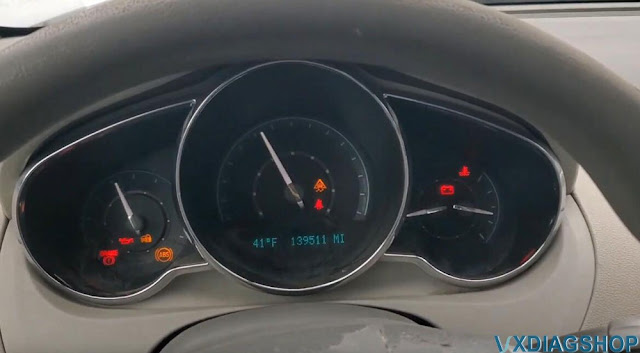
Program GM E37 ECM with VXDIAG VCX NANO GM & SPS2 18

Done.

www.vxdiagshop.com