2020/07/31

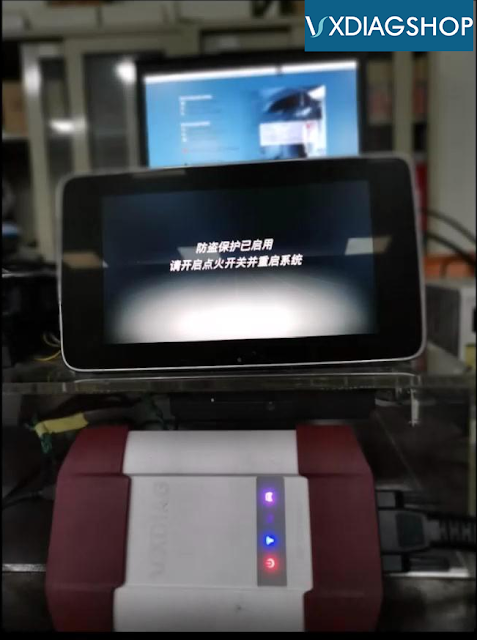
Benz HU5 DoIP Programming with DTS Monaco

HU5 control module data from "Xentry Diagnosis" needs export,And then DTS Monaco engineering software from where import to perform programming smoothly.

Connect VXDIAG Benz c6 multiplexer:

vxdiag-benz-c6-dts-monaco-doip-programming-01

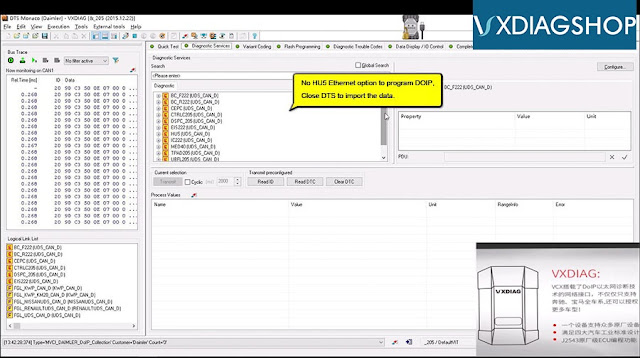
Open DTS Monaco - VXDIAG, click on "Diagnostic Services" and it has no HU5 Ethernet option and can't program DOIP, click on "File" and then "Close" to exist DTS to import the data.
vxdiag-benz-c6-dts-monaco-doip-programming-02

Click on "Administrate and manage DTS projects".
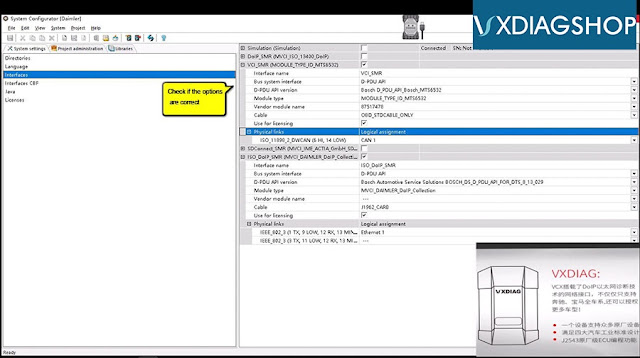
Enter "System Configurator" - > "System settings" -> "Interfaces", check if the options are correct as below.
vxdiag-benz-c6-dts-monaco-doip-programming-04
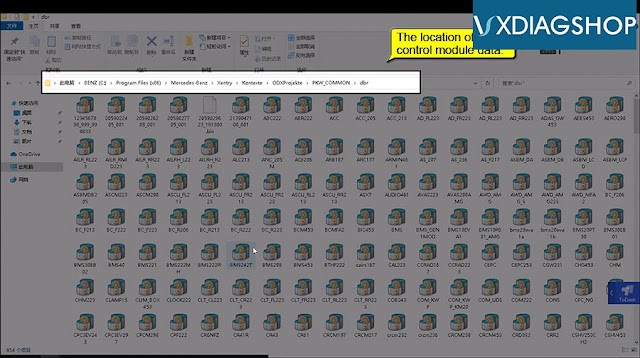
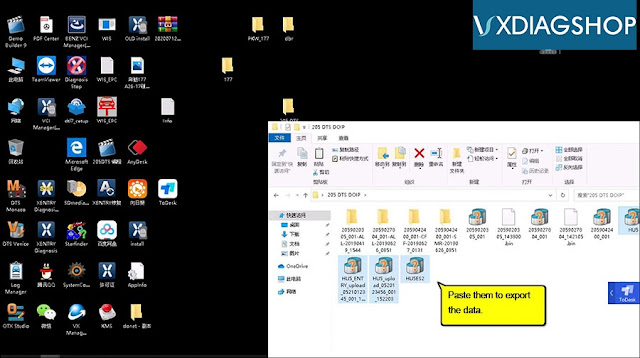
Right click on "Xentry Diagnosis" - "Open file location" -> "Xentry" -> "Kontexte" -> "ODXProjekte" - >PKW_COMMON" -> "DBR". This is the location of HU5 control module data.
vxdiag-benz-c6-dts-monaco-doip-programming-05
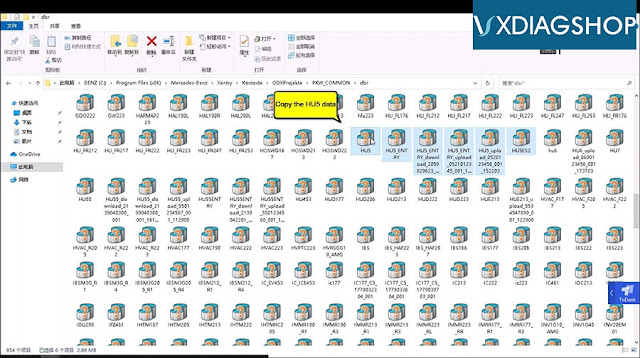
Choose the HU5 control module data to copy, then paste them into "205 DTS DOIP" folder.
vxdiag-benz-c6-dts-monaco-doip-programming-06

vxdiag-benz-c6-dts-monaco-doip-programming-07
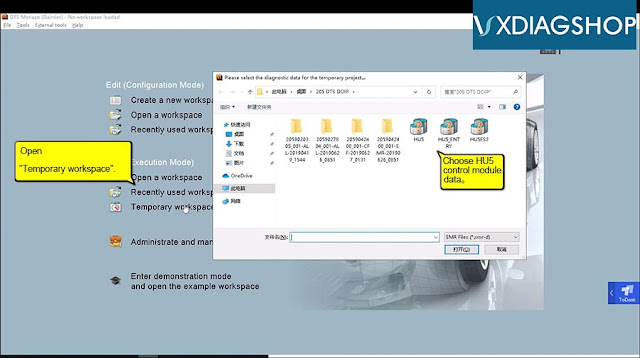
Open "Temporary workspace", choose HU5 control module data.
vxdiag-benz-c6-dts-monaco-doip-programming-08
Enable DOIP switch.
vxdiag-benz-c6-dts-monaco-doip-programming-09
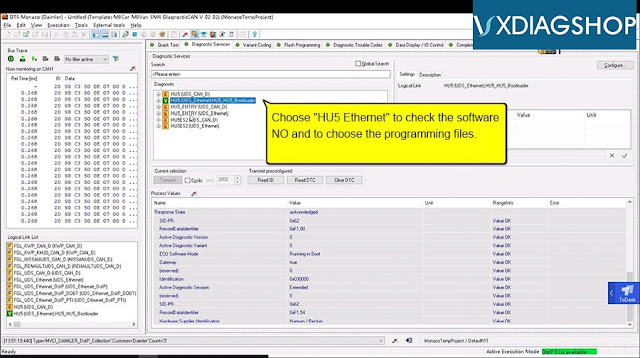
Choose "HU5 Ethernet" to check the software NO and to choose the programming files.
vxdiag-benz-c6-dts-monaco-doip-programming-10
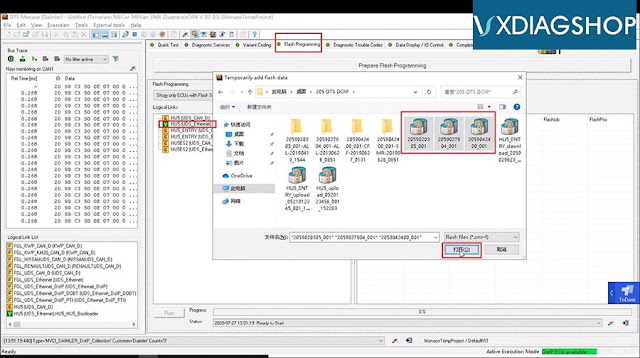
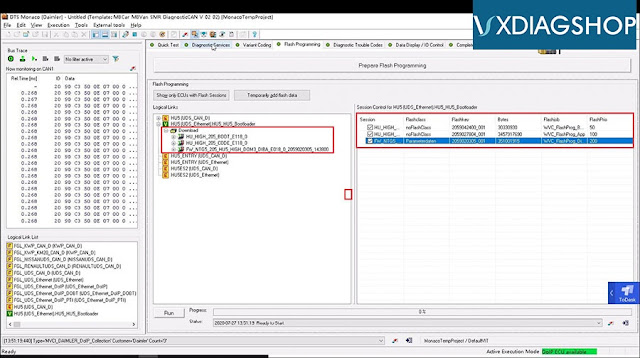
Click on "Flashing programming", then "HU5 (UDS_Ethernet)", then "205 DTS DOIP", then choose the 3 files to open.
vxdiag-benz-c6-dts-monaco-doip-programming-11
vxdiag-benz-c6-dts-monaco-doip-programming-12
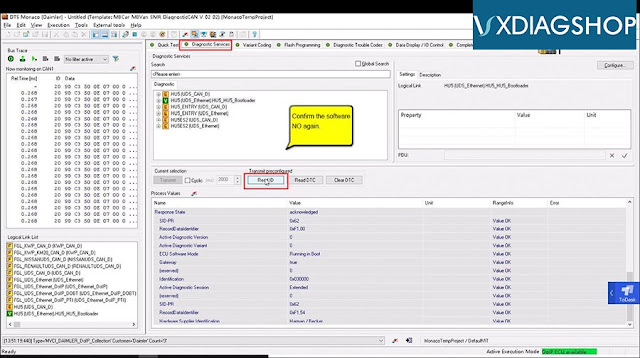
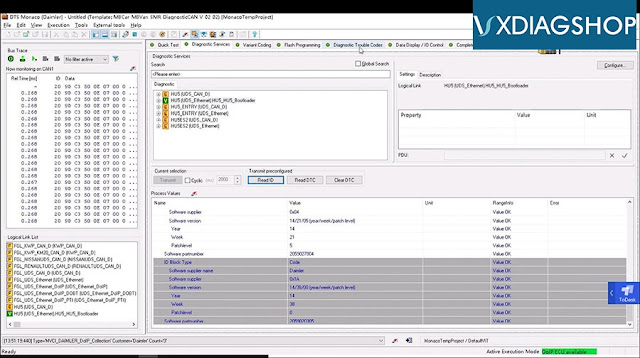
Click on "Diagnostic Services", then "Read ID" to confirm the software NO again.
vxdiag-benz-c6-dts-monaco-doip-programming-13
vxdiag-benz-c6-dts-monaco-doip-programming-14
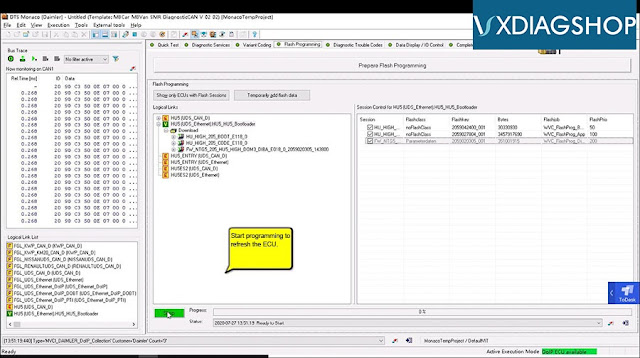
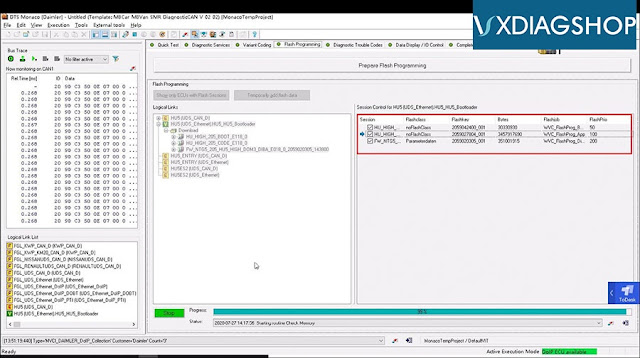
Click on "Flash Programming" , then "Run" one by one.
vxdiag-benz-c6-dts-monaco-doip-programming-15
vxdiag-benz-c6-dts-monaco-doip-programming-16
Job is done.

VXDIAG VCX C6 is a nice DOIP programming tool.
vxdiag-benz-c6-dts-monaco-doip-programming-17

Source:


2020/07/30

VXDIAG Volvo Computer not Fulfill VIDA Requirements

Problem: 
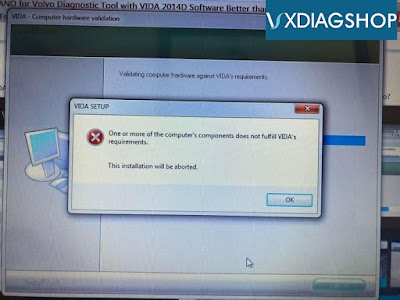
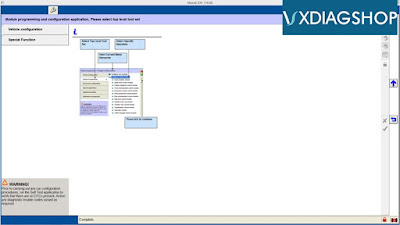
Vxdiag vcx nano Vida 2014d software installed on my laptop (Windows 10 system) and screen shows that This installation will be aborted. It reported an error "one or more of the computer's components does not fulfill VIDA's requirements.

VXDIAG Volvo Computer not Fulfill VIDA Requirements

Possible reason: 

Operating system is not compatible with VXDIAG Vida software.


Solution:
Better install VIDA 2014D software on Windows 7 32bit operating system. Make sure VX Manager driver has been installed well.
If still have trouble installing VIDA 2014D software, recommend getting the VXDIAG Volvo and Lenovo T410 laptop bundle package.
Software is pre-installed and ready to use.

Source:

http://blog.vxdiagshop.com/2020/07/30/vxdiag-volvo-vida-installation-aborted-solution/

2020/07/28

VXDIAG VCX NANO Mazda CX-7 Test Report

There is vxdiag vcx nano Ford/Mazda 2-in-1 device whichw bought on Chinese 6.18 promotion.  Naturally, this is a Chinese clone of the expensive VCM IDS dealer device.
According to the description- the device fully works with IDS software, and can also be friendly with any software that supports the J2534 PassThru standard.
I decided to diagnose and program module by myself. BTW, I am driving a Mazda CX-7 Turbo-fashion.

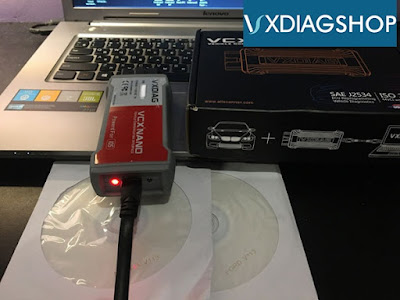
vxdiag-vcx-nano-mazda-cx7-review-1

The package arrived on time. I got the USB version because I am not good at WiFi stuff.
vxdiag-vcx-nano-mazda-cx7-review-2

Installed the latest version of VX Manager from allscanner.  Connect vcx nano interface to the laptop with the USB cable.

vxdiag-vcx-nano-mazda-cx7-review-3
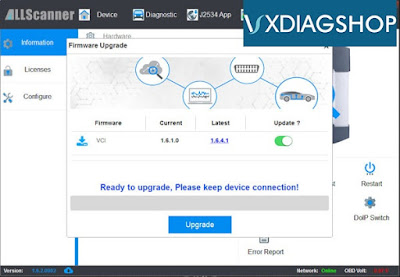
I immediately updated the device firmware to the current one.
vxdiag-vcx-nano-mazda-cx7-review-4

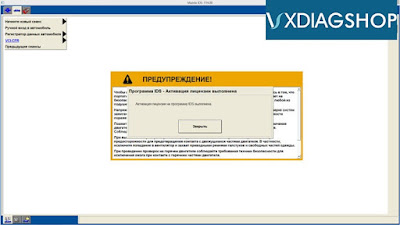
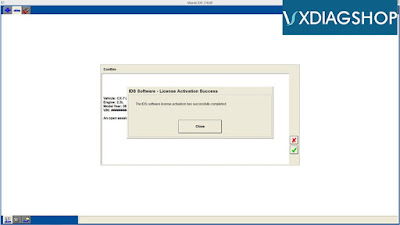
I downloaded the IDS 114.00 version from the bundled disk and patched it.
vxdiag-vcx-nano-mazda-cx7-review-5

They provides newer Mazda IDS V116.00 download resource as well.
The scanner has identified the car.
With the help of MazdaExtendProg file, he moved the trial period of coding and programming by 120 days.
vxdiag-vcx-nano-mazda-cx7-review-6

Mazda Module Programming
vxdiag-vcx-nano-mazda-cx7-review-7

And activated the engineering menu.
I did not have time to do anything else, I will find the time, I will study the functionality and all the possibilities.
So far, everything is smooth, it works stably, the impressions are good.

https://www.vxdiagshop.com/service/vxdiag-vcx-nano-review-on-mazda-cx7.html


VXDIAG VCX NANO Ford cannot Find Device Solution

Problem:
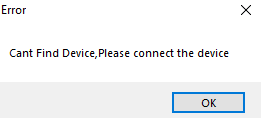
It has a problem when i run vxdiag vcx nano ford IDSPatch

2020/07/27

About VXDIAG VCX NANO GM 2011 Volt SPS Programming instruction

You can update the ecu software from SPS ( gm calls it calibration). Other tweaks can be done with gds2 offline.

I just did SPS programming with my 2011 Volt and here are the notes I made to myself so I could remember what I did.  Hope it helps.

Preparation: 
-Download newer version of software on vxdiagshop.com website, not the older version provided on the CD.
-Both the downloaded and the CD version of the file GDS2AutoInstall\GDS2Install\GDS2.exe are reported to have a virus by both Windows 10 Defender (on the Win10 laptop) and Comodo (on the eePC laptop). One needs to turn off all virus protection to get the GDS2 package to install.
I have not been able to get the Tech2Win software to work on Windows 10.  The Tech2Win installer and the GDS2 installer seem to use different versions of the GM MDI package, so the order of install may matter quite a bit. But i have managed to get it working on Windows 7 32bit.
Note:The Volt has TWO OBDII connectors, one on the driver's side and one on the passenger side. I could only get the driver's side to work with the ACDelco SPS module upgrade software.
Generally want the car in Service Mode when messing with this stuff. Without touching the brake pedal, push the start button for 5-10 seconds.

What worked on the Window 10 x64 PC and Windows 7 x32 PC:
TO INSTALL VxDIAG provided software:
- Turn off virus protection (e.g. Windows Defender)
- Install VMWare-player. Use 15.5.1 on a Windows 10 x64, and 6.0.6 on 32 bit Windows 7 machines. I think 6.0.6 is the last VMWare-player to include 32bit OS support.
- Install the downloaded version of the VX Manager. This code seems to manage the interface to the VXDiag VCX Nano for GM dongle.
- Install the downloaded version of the GDS2 package using the autoinstaller (click on GDS2AutoInstall.exe)
- Now need to run VxManager with dongle attached. Go to the Diagnostic tab, and install the three drivers there (PASSTHRU, GM GDS2/T2W, SGM RDS).  I always installed all three. Don't think GDS2 will work without at least the GDS2/T2W driver.

TO USE:
- Start VXManager. This always has to be running first. Make sure it connects with with the dongle. Seems like the config can be set to AUTO and it still works. On Win7 it needed to be set to USB though.
- Start GDS2.exe.
- Click on the Diagnostics block in the upper left
- Select MDI2 Device (must be this device!)
- Could only get GDS2 to work on the driver's side OBDII port. The passenger side OBDII won't communicate.
INTERPRETING BATTERY CAPACITY: 2011 Volt shipped with 16 kWh battery (when new).
Battery Capacity is represented as a hex number, HH. It is readable at
Module Diagnostics\Hybrid Power Control Module 2\some reset grouping somewhere
To convert to kilo-watt-hours (kWh):
Convert HH to Decimal, DD.
DD/10 = AA Amp-hours
AA * 358 Volts / 1000 = battery capacity in kWh
For example, on 1/17/2020, with about 85000 miles on the car, we read a hex value of 0x179 = HH.
DD = 377, so 37.7 Amp-hours
37.7 Ah * 358 V /1000 = 13.5 kWh battery capacity.
13.5/16 = 84.3% of original capacity.


ACDelco Module upgrade software (https://www.acdelcotds.com/subscriptions)
This whole package seems to be a Java application, so will need Java installed.
TO INSTALL: (only tried this on Windows 10 x64)
- Click on the "View" button for our subscription to Vehicle Programming Software (bought the $40 one VIN only option)
- Click on the VIN
- Some informational screens may be displayed, need to scroll down to the bottom to click on OK buttons. One of these will be about installing new J2534 wrapper software.
- Click on SPS (Service Programming System) icon
- Click on "start SPS" button. This will download a java applet that will control the rest of the install process.
- At some point it will ask to install three new packages. Do NOT install a newer version of the GM MDI package (pick DO NOT INSTALL). Seems like we need to use the VXDiag supplied MDI to work with the dongle. The other two packages seem to have to do with the J2534 wrapper. I tried "version 6" for the bottom package, not version 7. It might work with version 7.

TO USE:
- Put the car in Service Mode. Without touching the brake pedal, push the start button for 5-10 seconds.
- Start VXManager software, make sure it connects to dongle.
- Select VXDiag GM interface in the SPS software java app.
- Could only get this all to work with the driver's side OBDII connector. When installed on the passenger side OBDII connector, it complains with some "Detected Off-board programming!" error or something like that. So I couldn't update modules only accessible from the passenger side OBDII.
- When I reprogram the brake module, it threw a hard service code and disabled brake assist (BE CAREFUL DRIVING THE CAR WITHOUT BRAKE ASSIST AS IT TAKES MUCH MORE PEDAL EFFORT TO APPLY THE BRAKES). I then needed to run GDS2 and do the learn procedures for that module. This cleared the code and got the brake assist working again.

Credit to GM expert from gm-volt.com.

Source:
http://blog.vxdiagshop.com/2020/07/27/vxdiag-vcx-nano-gm-2011-volt-sps-programming-review/

2020/07/23

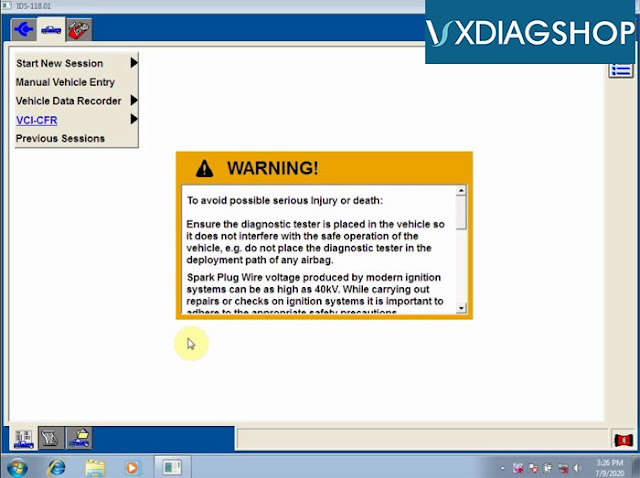
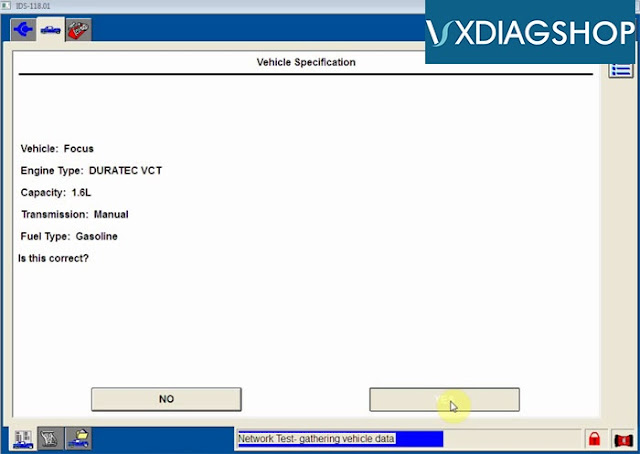
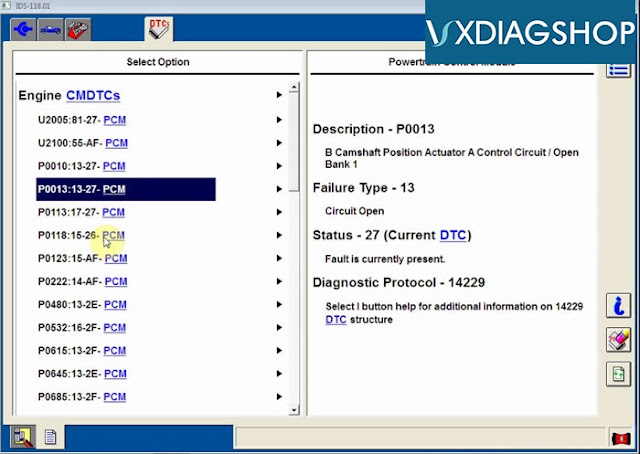
How to solve VXDIAG Ford IDS V118 Blue Screen Problem

Problem:
Hi, I have downloaded and installed the IDS V118.01 for vxdiag vcx nano Ford, but had error when running Ford IDS software. It turned blue screen and won't let me move on.
VXDIAG Ford IDS V118

Solution:
1.Install Ford VCI Manager driver


2. Run IDS software from Patch directly (rather than from vx manager)


Follow VXDIAG Ford IDS V118 software installation guide here step-by-step:

Source:

VXDIAG VCX NANO Volvo VIDA Tested on S40 2005

Since this vxdiag vcx nano volvo scanner is practically new and there is little information about it, I offer this text for review.  I am driving a Volvo S40 II year 2005.

We all know that there is an original Volvo vida dice. We also know that there is a Chinese copy of the above original (the price is around 5 times less, but the functionality is not complete). And now a fresh one appeared: the functionality (as they promise) is more than a replica, and the price is cheaper than a DiCE copy - I took it for the test. I ordered it on a well-known site www.vxdiagshop.com... here it is.
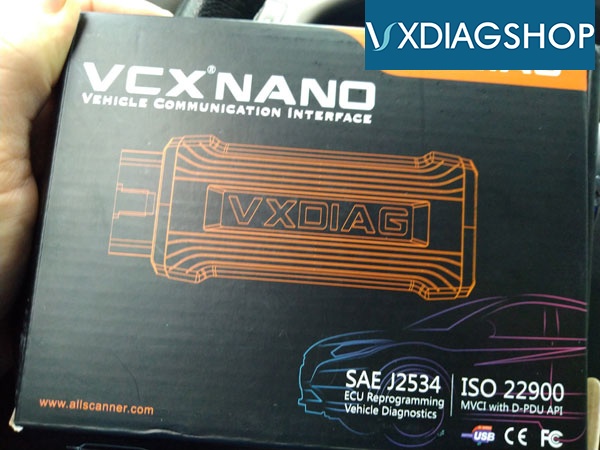
vxdiag-vcx-nano-volvo-s40-review-1
vxdiag-vcx-nano-volvo-s40-review-2


To work with him, you need to install Vida software (There are many places where she is - 2014d, there is no point in talking about her, and so much has been written).
So we installed Vida 2014D, tried to turn it on, let's move on.
To work with vxdiag volvo, you need a special software: vx manager (program), it is free, it weighs a penny and is easy to download on vxdiag.net official website.  There at the bottom of the VX Manager
The current version is V1.6. 2 Build 0902
The latest build date is 2019.09.02 and from the right - download.
Always update the driver to latest version.
Download, unpack, launch. (The antivirus will appear when downloading, but everything is fine.). We connect the device.
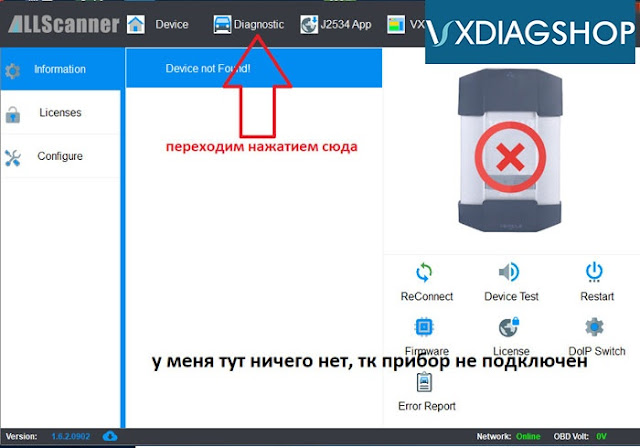
Open the program:
vxdiag-vcx-nano-volvo-s40-review-3


This is what the case looks like. Follow the arrows.

vxdiag-vcx-nano-volvo-s40-review-4


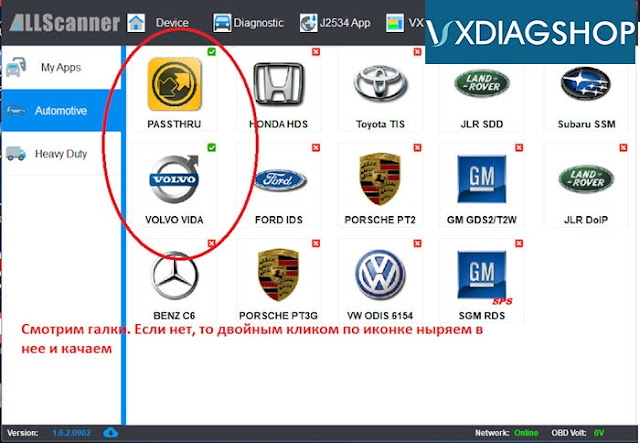
We look at the check marks on the side of the icons.  Passthru and Volvo vida driver are required to be installed.
vxdiag-vcx-nano-volvo-s40-review-5


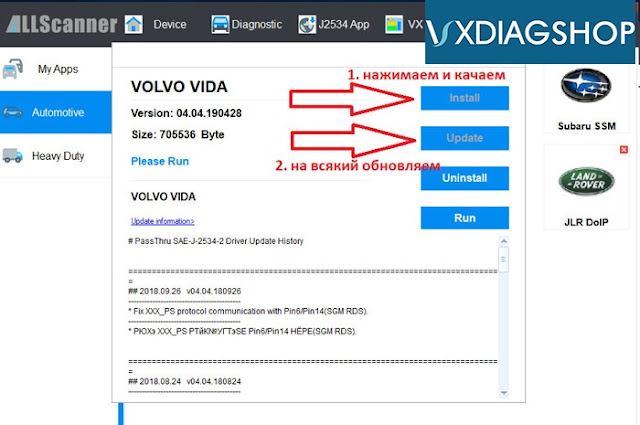
Downloading.

After all that has been done, if you want, you can climb up and down the program, but in fact, at this stage, we don't need it, and we don't need it anymore. We close everything, turn off the laptop.
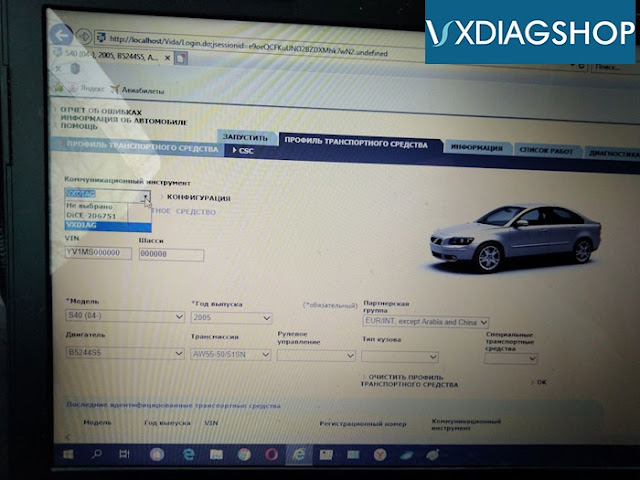
Next, go to the car, turn on the computer, connect the vcx nano interface to the car, turn on Volvo Vida software (as usual), but in the configuration we select another tool !:
vxdiag-vcx-nano-volvo-s40-review-6


Everything works.
In theory, the device is more convenient than the original or its Chinese copy (but there is anyone else), but in terms of functionality it is no worse than a Chinese copy 100%! When testing the vxdiag device, I turned on (activated) the window closer - everything worked out. Well, I carried out diagnostics with erasing errors. No bugs or glitches were noticed. I will continue the test at the end of the week and try to update the review, maybe I am tormented by doubts that there is a very interesting function for this device, but more on that later.
Source:
http://blog.vxdiagshop.com/2020/07/23/vxdiag-vcx-nano-vida-review-on-volvo-s40-2005/
2020/07/22

VXDIAG DTS Monaco Cannot Run without License Key Solution

Problem:

I got problem to activate the DTS Monaco 8.14 using VXDIAG Benz C6 multiplexer.

Error report: “Sorry, this software cannot be run without a license key.”

VXDIAG DTS Monaco Cannot Run without License Key Solution

Vxdiagshop.com Solution:

The current version DTS for Benz C6 goes to 8.13.029.

8.14 has not been tested with our C6.

VXDIAG C6 Benz DTS Monaco software does not require activation/registration.  Ready to use when insert HDD via USB cable.

Source:

http://blog.vxdiagshop.com/2020/07/22/vxdiag-dts-monaco-cannot-run-without-license-key-solution/

2020/07/20

Solved! VXDIAG Device is Not Supported by GM

Problem:
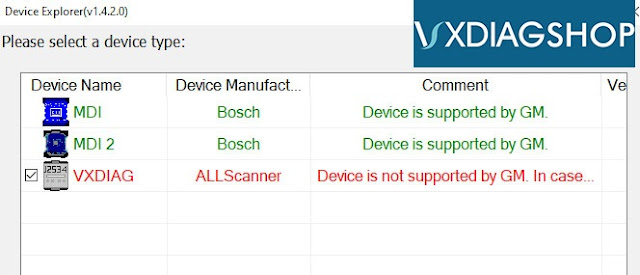
I have downloaded and installed the GDS2/Tech2Win software, vx manager driver from you website.  When i connect the vxdiag vcx nano gm interface with laptop, run GDS and select hardware as VXDIAG Allscanner , it failed to connect and gave error “Device is not supported by GM”. Any idea how to solve it?
vxdiag-device-not-supported-by-gm

Solution:
1.For newer GDS2 software version, choose MDI Bosch (1st option) to connect.
2. For older version GDS2 software, choose MDI 2 Bosch to connect.

2020/07/19

VXDIAG HDD Common Startup Errors Solution

As titled, here vxdiagshop.com provides some solutions to vxdiag vcx plus HDD/ SSD common errors.

1).
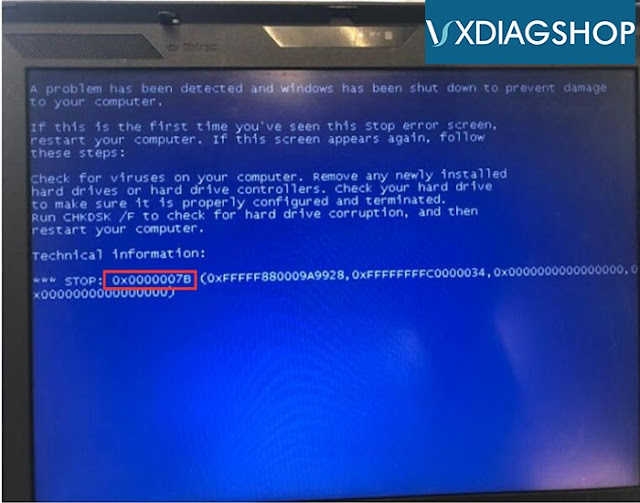
Error 0x0000007B with Blue screen when insert HDD to laptop 
vxdiag Error 0x0000007B
Solution:
Turn on laptop, press F2 to enter BIOS, set the HDD format to AHCI.
Then press F10 to save setting.
Restart computer.


2).
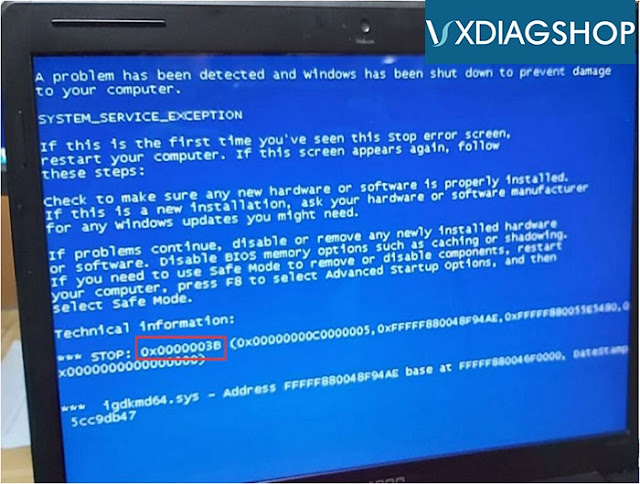
Error 0x0000003B with blue screen 
vxdiag Error 0x0000003
Solution:
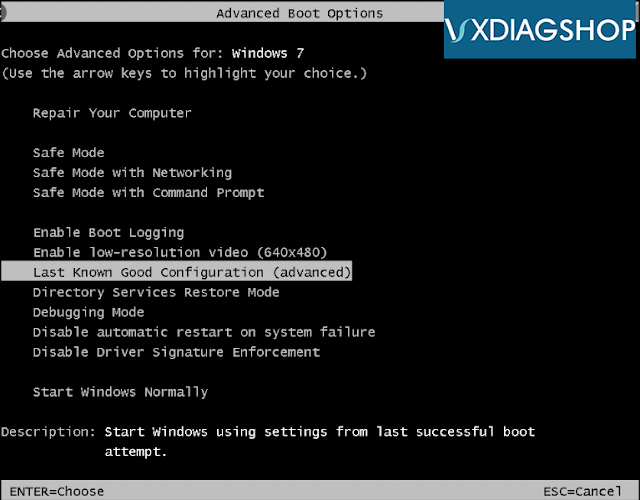
1. Restart computer, long press F8 and select “Last known good configuration (advanced)”
vxdiag Error 0x0000003 solution
2. If you have installed vxdiag software or driver before blue screen,  enter Safe Mode, delete software or driver you have installed. Then restart computer.
3. If blue screen still exists or fail to enter Safe Mode, need to reinstall computer operating system.
4. If blue screen still exists after reinstall operating system, it can be caused by hardware issue.
Clean the dust on the computer, remove memory, graphics card, PCI slot from computer, and try it with a rubber probe.
High temperature or poor contact will cause blue screen problem as well.
Remove CPU, fans,  graphics card and replace with new thermal silica gel.
Check whether the temperature of all hardwares are normal.
Because of the high temperature caused by dust and poor contact, it can also cause a blue screen; at the same time, remove the fans such as CPU and graphics card and replace with new thermal silica gel; in addition, check whether the temperature of all hardware is normal.


3).
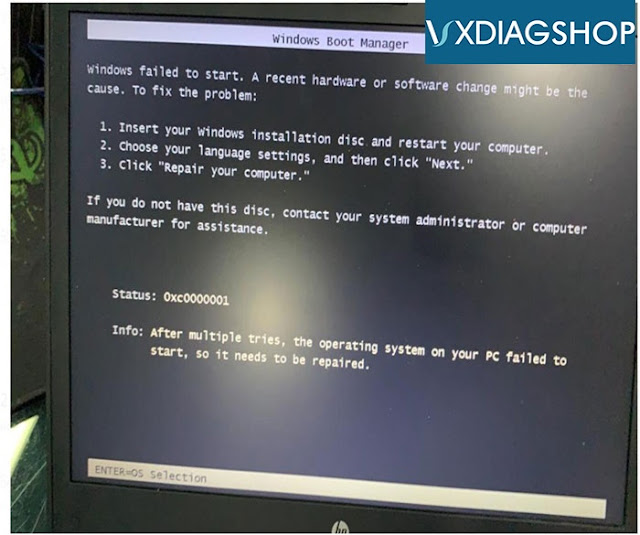
Windows failed to start.
Status: 0xc0000001
Error 0x0000001 vxdiag
Follow video guide to perform system boot repair via U disk

2020/07/17

How to Install Ford IDS V118 for VXDIAG VCX NANO?

How-to: install Ford/Mazda IDS V118.01 software for vxdiag vcx nano scanner.

Version:
Ford IDS V118.01
Mazda IDS V118.01

Operating system: Window 7, Windows 8, Windows 10  32& 64bit

Compatible device:  vxdiag vcx nano for Ford/Mazda USB and WiFivxdiag vcx provxdiag full , vcm2 clone (using vxdiag solution) etc


Main Steps:
1.Install Ford IDS setup
2.Install VCI Software
3. Install VCI Manager(Ford)
4. Run software from Patch

Step 1: Install Setup
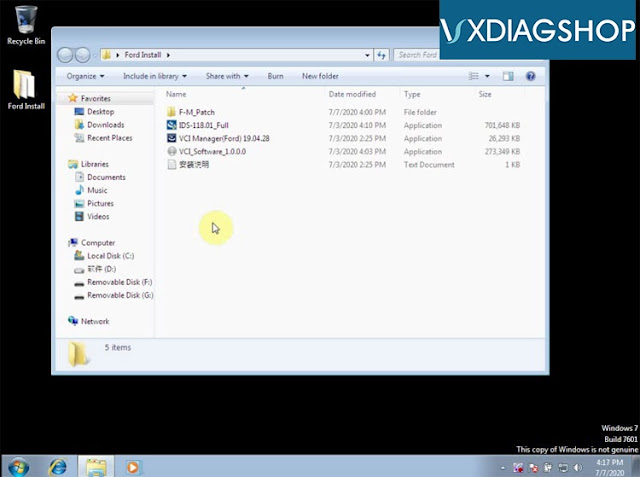
install-vxdiag-ford-ids-v118-1

Open IDS-118.01_Full setup
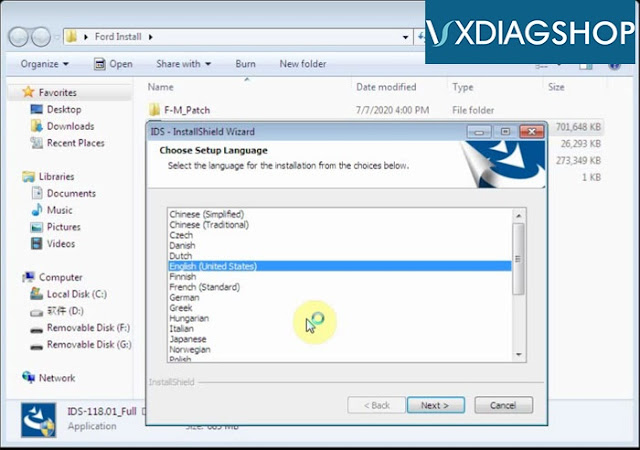
install-vxdiag-ford-ids-v118-2

Select software language, press Next
Install InstallShield Wizard for IDS, press Next
Accept license agreement
Select destination folder
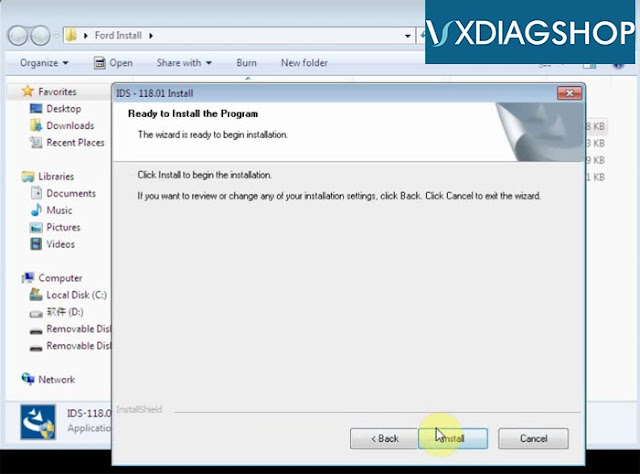
install-vxdiag-ford-ids-v118-3

Press Install
Configuring
Updating database
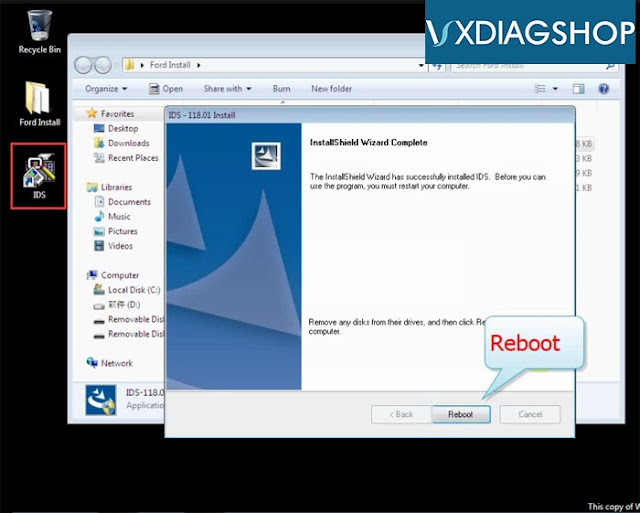
install-vxdiag-ford-ids-v118-4

Restart the computer
Step 2: Run VCI software
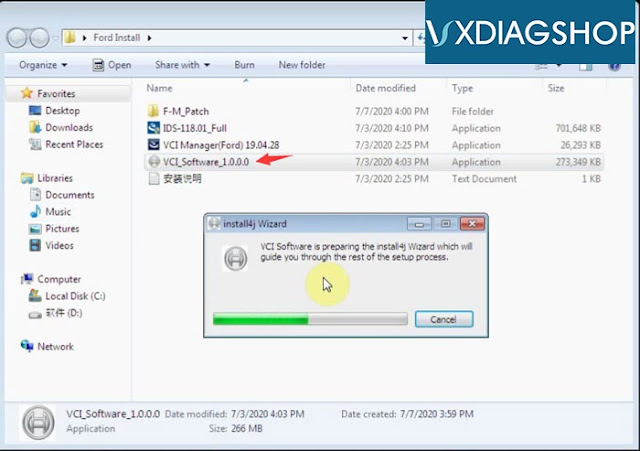
install-vxdiag-ford-ids-v118-5

Run VCI_Software_1.0.0.0
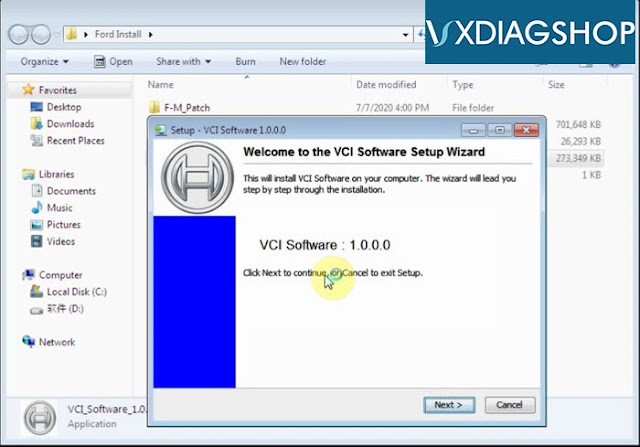
install-vxdiag-ford-ids-v118-6

Install VCI software setup wizard, press Next
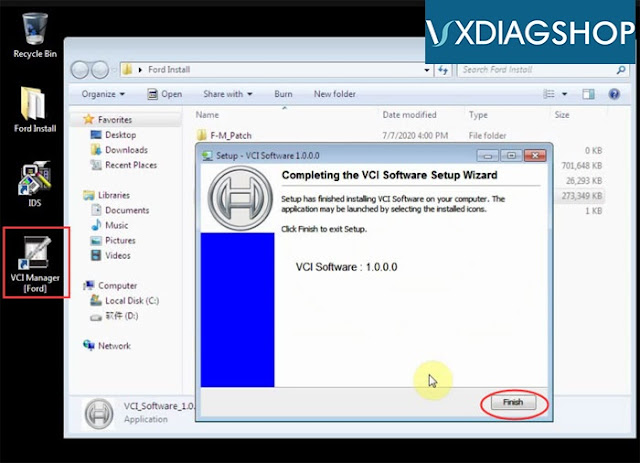
install-vxdiag-ford-ids-v118-7

Finish installing VCI software

Step 3: Install VCI Manager
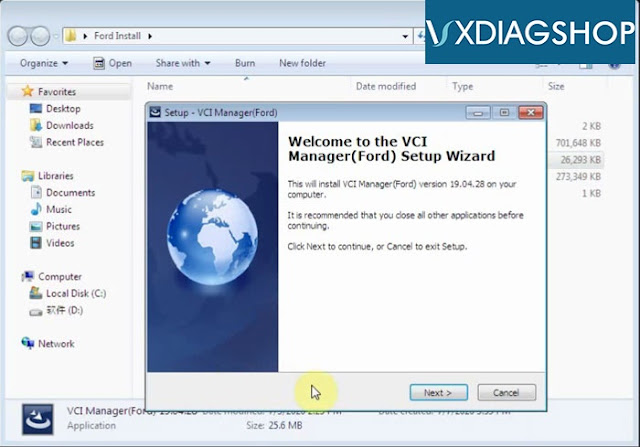
install-vxdiag-ford-ids-v118-8

Run VCI Manager (Ford) 19.04.28
Press Next
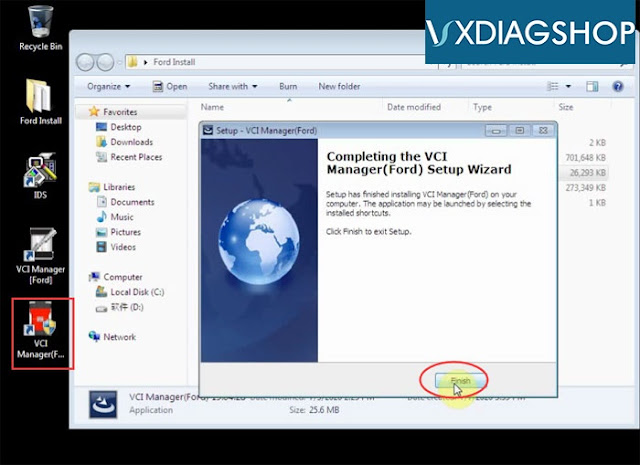
install-vxdiag-ford-ids-v118-9

Finish installing VCI Manager

Step 4: Install IDS Patch 
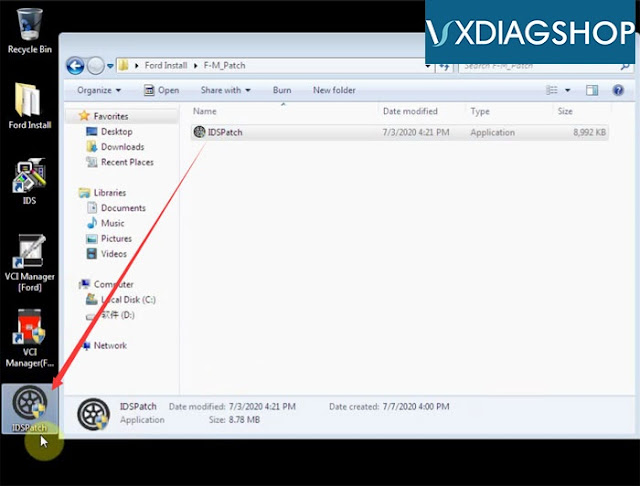
Open F-M_Patch folder
install-vxdiag-ford-ids-v118-10

Copy and paste IDSPatch to desktop
install-vxdiag-ford-ids-v118-11

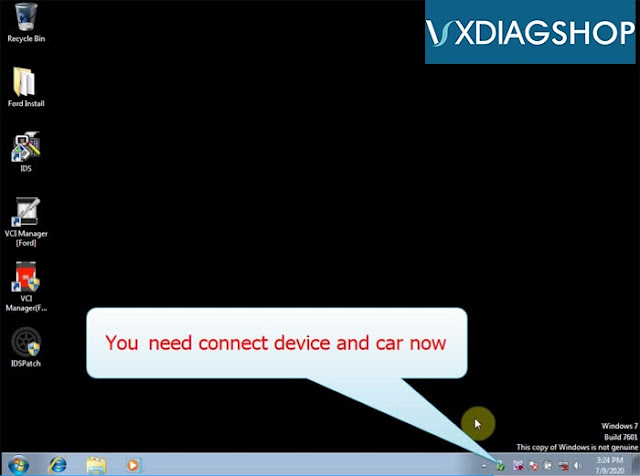
Connect vxdiag vcx nano ford with computer and vehicle
Run IDSPatch on desktop
install-vxdiag-ford-ids-v118-12

Select Dealer type: Non-dealer and country
Press Tick button
Ford IDS V118.01 software is ready to use.
install-vxdiag-ford-ids-v118-13

install-vxdiag-ford-ids-v118-14

install-vxdiag-ford-ids-v118-15