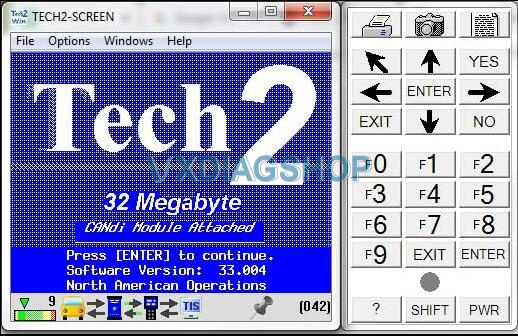
You will find no cheaper alternative compatible with Tech2Win. Rest assured, if you install it exactly as described below you will find success – in fact, I just completed an automatic ABS bleed today with my GMC Sierra 2500HD!
Disclaimer:
As indicated by others, viruses and hidden software may lurk in the required files. However, my own scan with Kapersky did not flag any. Regardless, it is recommended to perform a fresh OS install on spare/burner PC for three reasons:
1) No personal files or info to worry about
2) Windows 7 Professional 32-Bit is required. If you don’t already have it, you will need to get it and perform a fresh install. There are many documented failures from attempting to use Windows 10, Win 7 64-bit, etc -I prefer Win7.
3) Lastly if you think you can get away with running Windows 7 Pro 32-bit inside a Virtual Machine, think again – Tech2Win will crash while establishing vehicle connection (ask me how I know).
Okay, on to the guide…
1) Perform fresh install of Windows 7 Professional 32-bit (x86).
2) Install drivers on your machine and all that good stuff.
3) Fully update windows via Windows Updates (skipping this step may result in cryptic “missing .dll”
errors during install).
4) Install Microsoft Visual C++ Redistributable 2010 to avoid more .dll errors.
5) From VXdiagshop.com, download the latest versions of the following (do NOT use the USB key):
-VX Manager
-VXDIAG GM GDS2
-VXDIAG GM Tech2Win
6) Unzip/extract as necessary. Inside the Tech2Win folder, run AutoInstall.exe.
7) Inside the GDS2 folder, run AutoInstall.exe. Expect long wait times. Note that GDS2 may not strictly be required for Tech2Win but I installed it anyways.
8) Install VX Manager – select PassThru & GM.
9) Plug in VCX Nano GM. Windows will automatically find and install the USB driver as long as step (8) has
been completed
10) Launch VX Manager. VCX Nano should now be recognized. If not, unplug and re-plug back in, restart VX manager, restart the computer, etc. It will show up eventually. Note that an OBD connection is not required at this time.
11) Go to Diagnostic tab at top. Double click “GM GDS2/T2W” and hit Install. Do the same to PassThru if it doesn’t already have a green checkmark.
12) Plug in to your vehicle.
13) Launch Tech2Win with VX Manager still open in the background. Tech2Win It should prompt you to select your communication tool in a popup window – pick GM MDI (not MDI 2). It should then pause and prompt you again, this time with one option – a string of numbers and “USB”. If it does not prompt twice, close Tech2Win and try again.
14) Hit OK at the second prompt. That’s it – Tech2 emulation is running and you should be able to communicate with your vehicle.
I’ve had fairly good luck pulling data and performing special functions with this since I got it working.
Good luck to you – hope the guide was helpful.


No comments:
Post a Comment